Want to waste less money, time, and effort in your outdoor shooting? Going places that don’t have the right views, wrong light, or the wrong angle of the light and you can wind up with sub-par shots, or missing them entirely. With this post, I will show you how to use some websites and apps to better plan location shoots, so you can better use your time and resources. Let’s take a look at the tools I used to plan this shot weeks before I actually took it. Continue reading “Digital Scouting”
Editing a Sunrise Shot
As part of my ongoing series of Capture One editing videos, here is one of an edit of a barn at sunrise shot. Continue reading “Editing a Sunrise Shot”
Four Edit Friday 5 – Boat Light
In this episode, we work on a picture I took at Cave Point County Park, in Door County, WI. As usual, the edits are done in Capture One Pro 10. Continue reading “Four Edit Friday 5 – Boat Light”
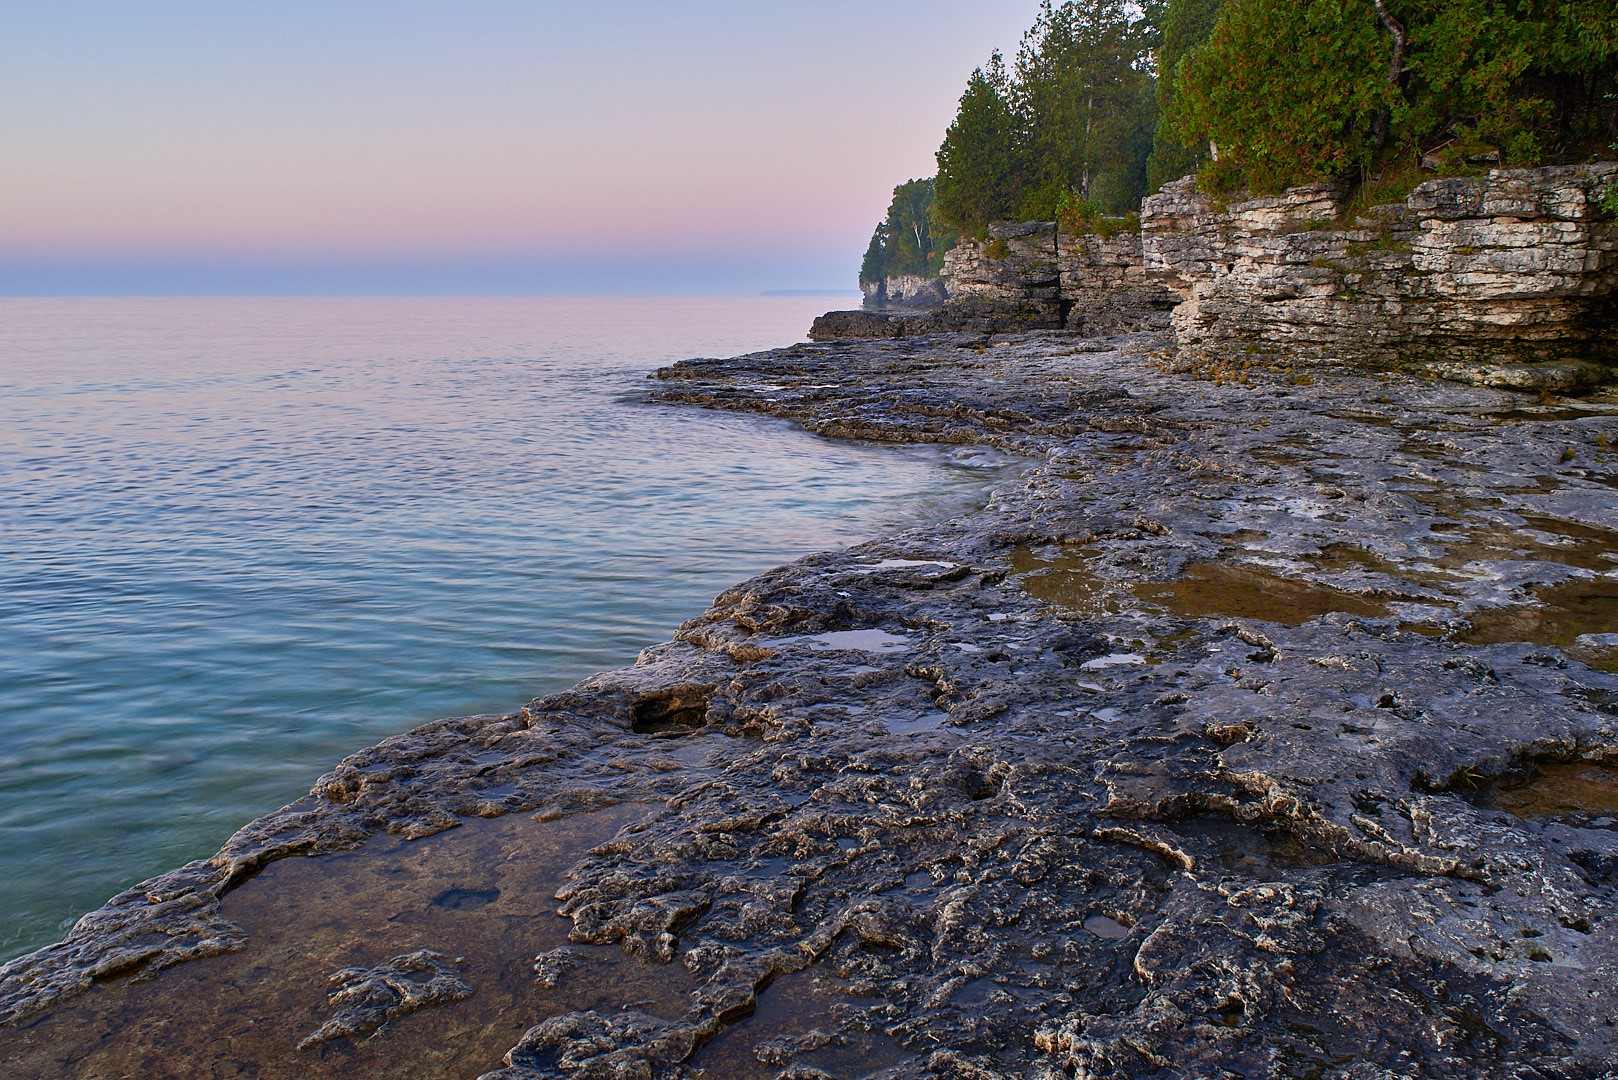
Four Edit Friday 4 – Cave Point
In this episode, we work on a picture I took at Cave Point County Park, in Door County, WI. As usual, the edits are done in Capture One Pro 10.
The initial edit is a standard edit
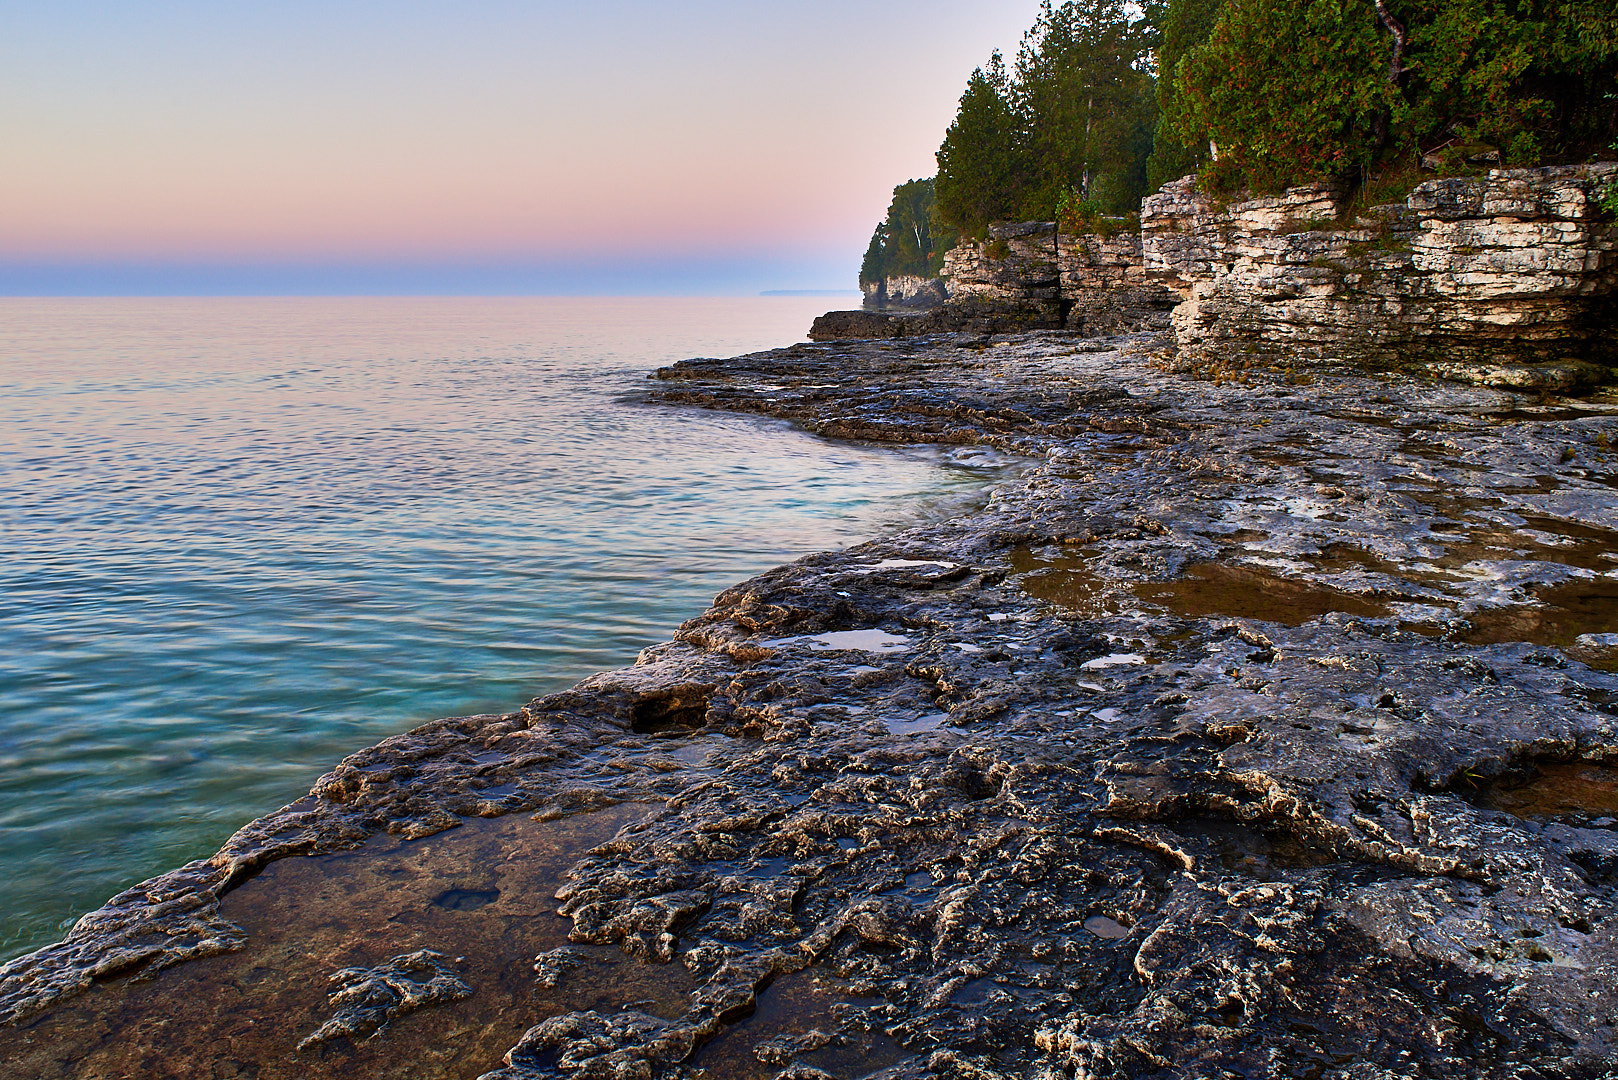
The second edit has exaggerated color and clarity.
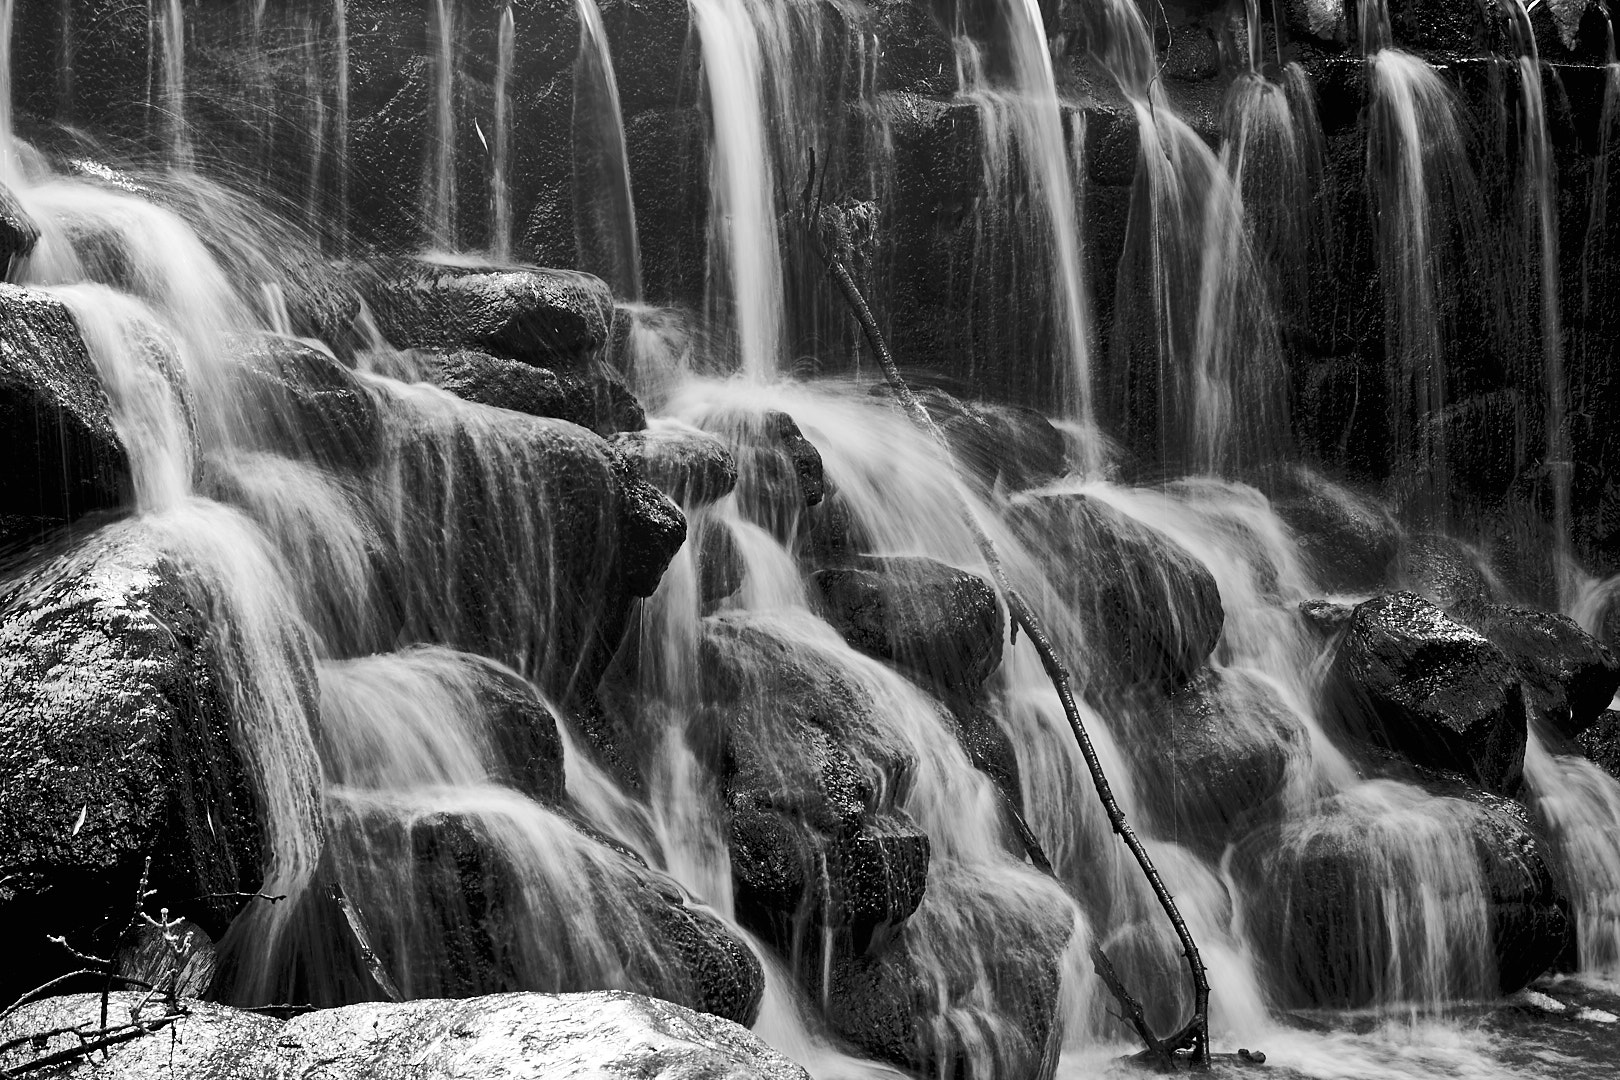
Black and white. This is a higher contrast edit, which I prefer for this image.

Selective reduced clarity for a soft focus effect. The picture takes on a more dreamy quality with the softer focus and muted colors.
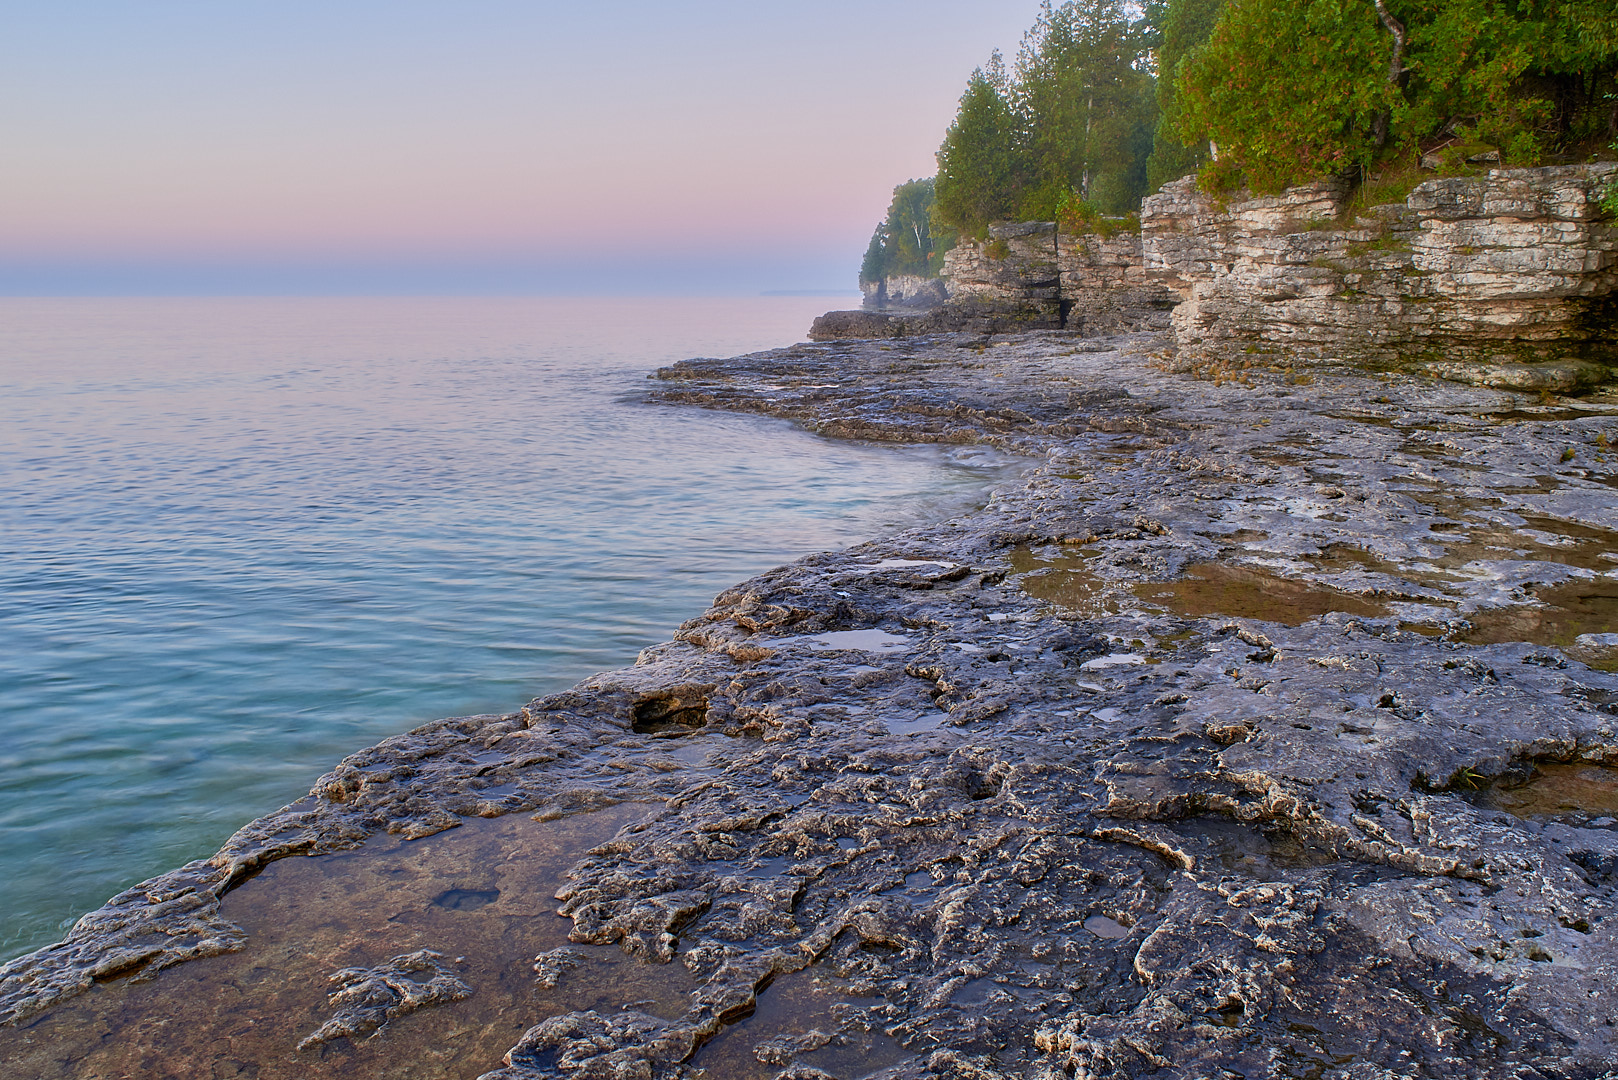
Which do you prefer? I think on this one I like the second photo. I would probably not use the soft focus effect much, but it is something interesting to play with.
Which do you prefer, or what would you have done differently? Please leave a comment below.
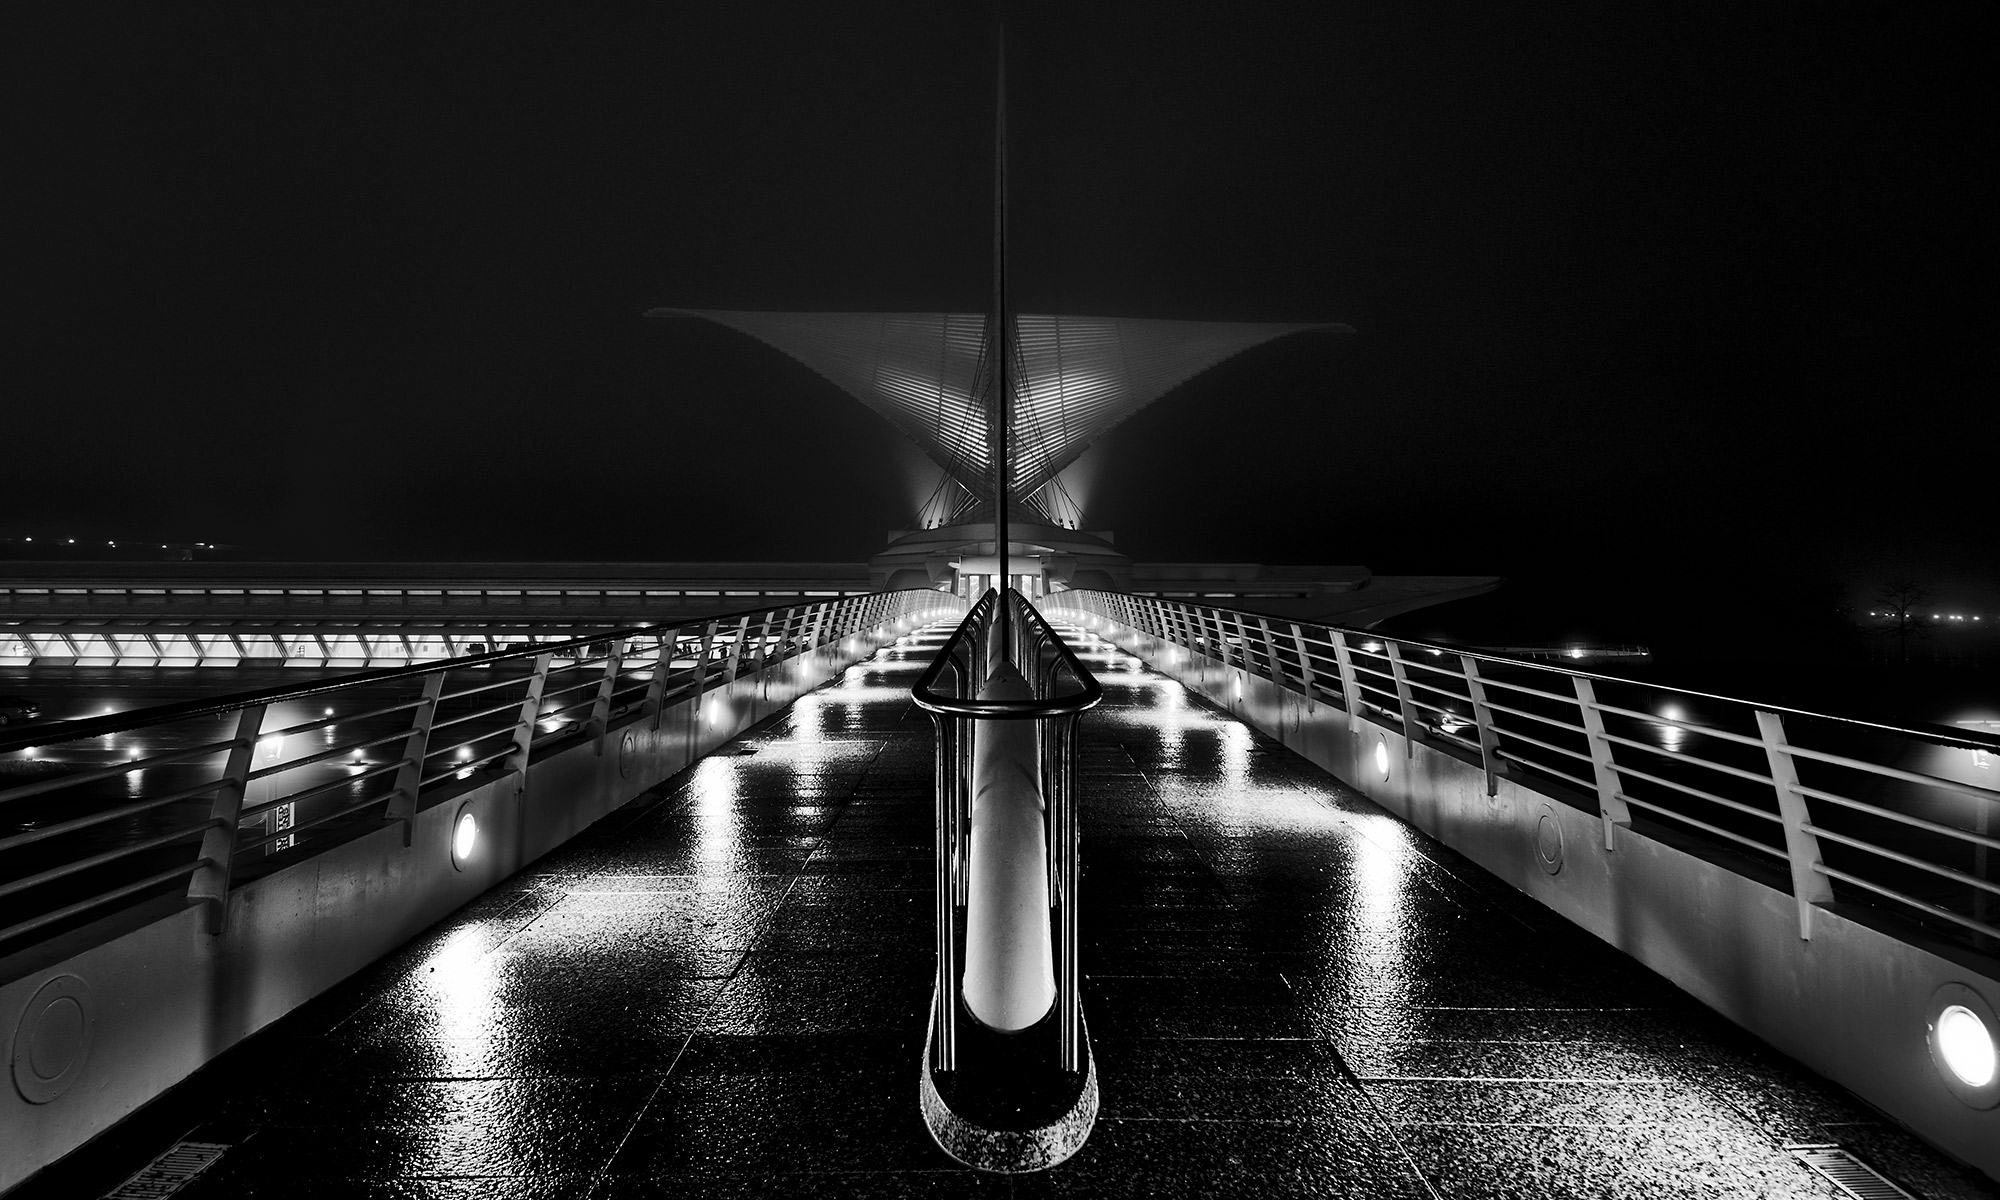
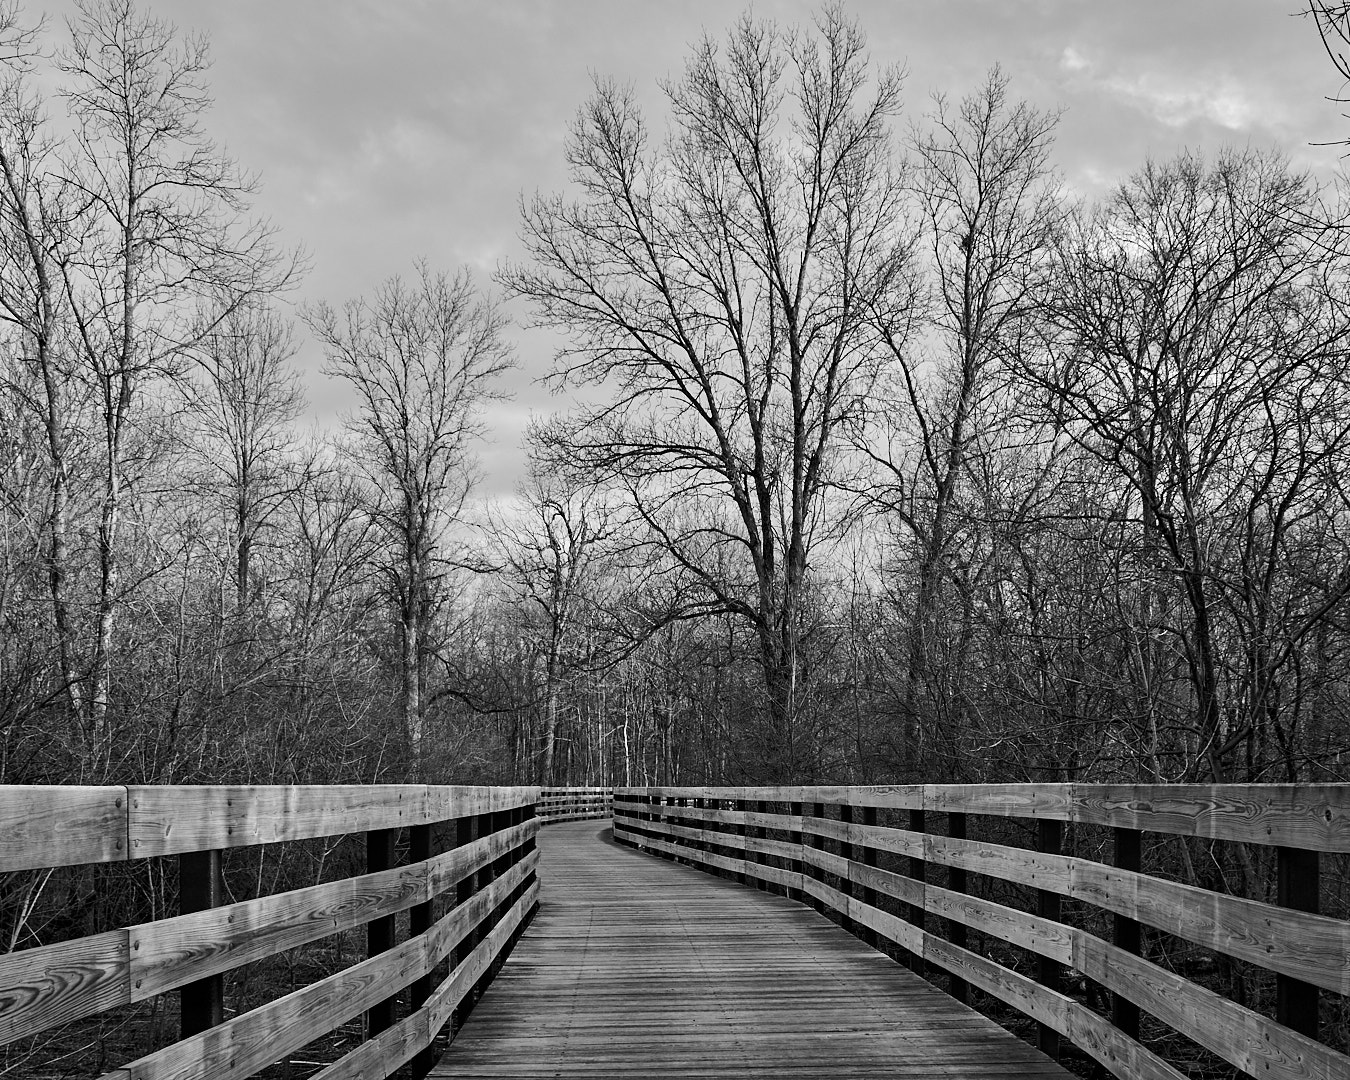
Four Edit Friday 3 – Bridge
In this Four Edit Friday, we look at a picture of a foot bridge.
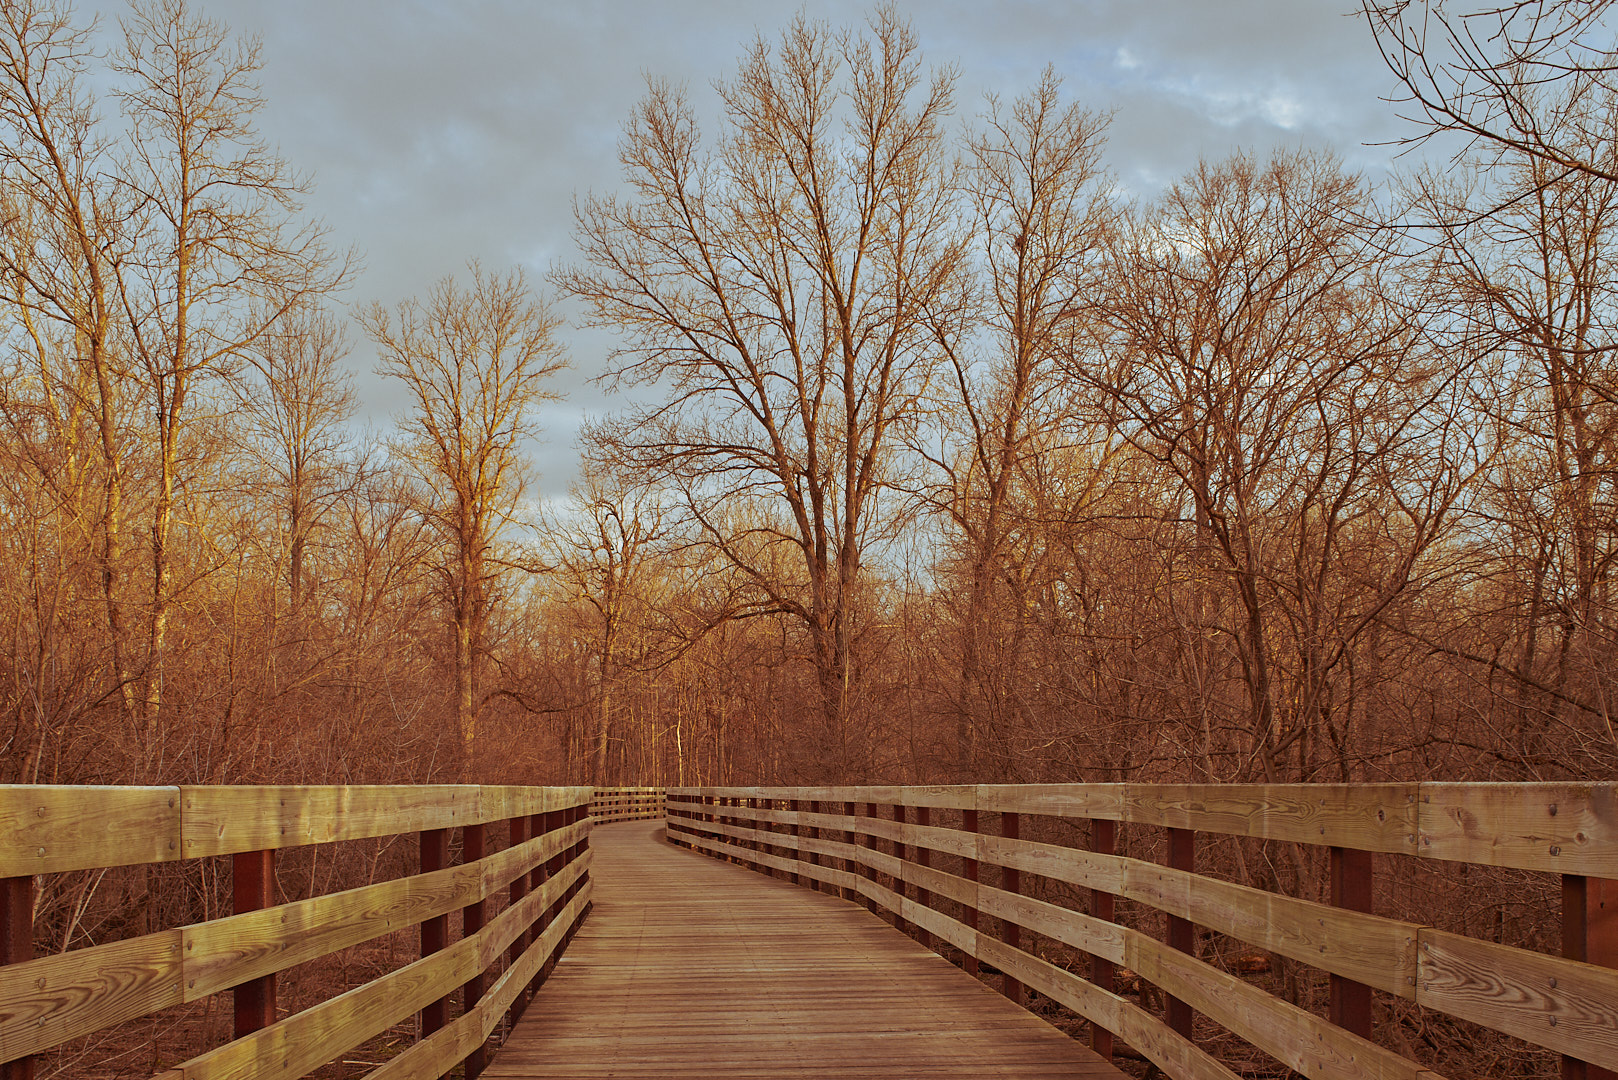
The first edit, as usual, is a fairly standard edit, mainly highlight recovery for the sky, and warming the color temperature. The photo is also cropped to 4×5, because I like that aspect ratio, and think it works for this image.

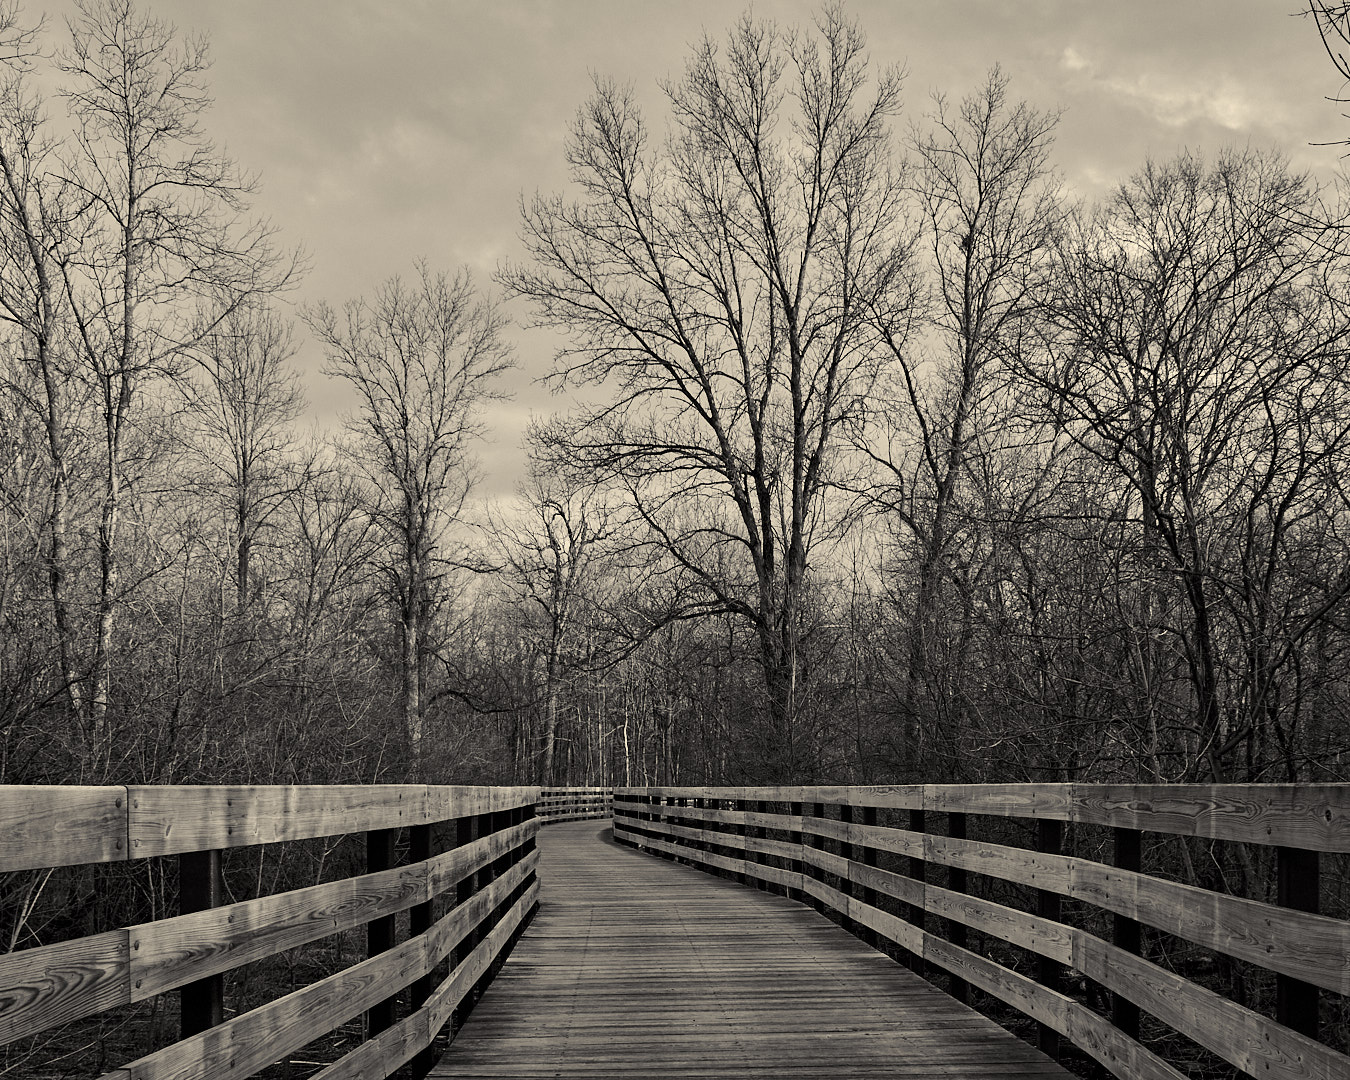
The second is a black and white, adding some contrast to the previous version.
The third one is just a sepia tone of the second, with a couple small tweaks.
The last one goes back to the original crop, and has some tone curve tweaks to give it an old film look.
I think I like the black and white edits, not sure whether I prefer the straight or toned version.
Which one do you like? Leave your thoughts in the comments.
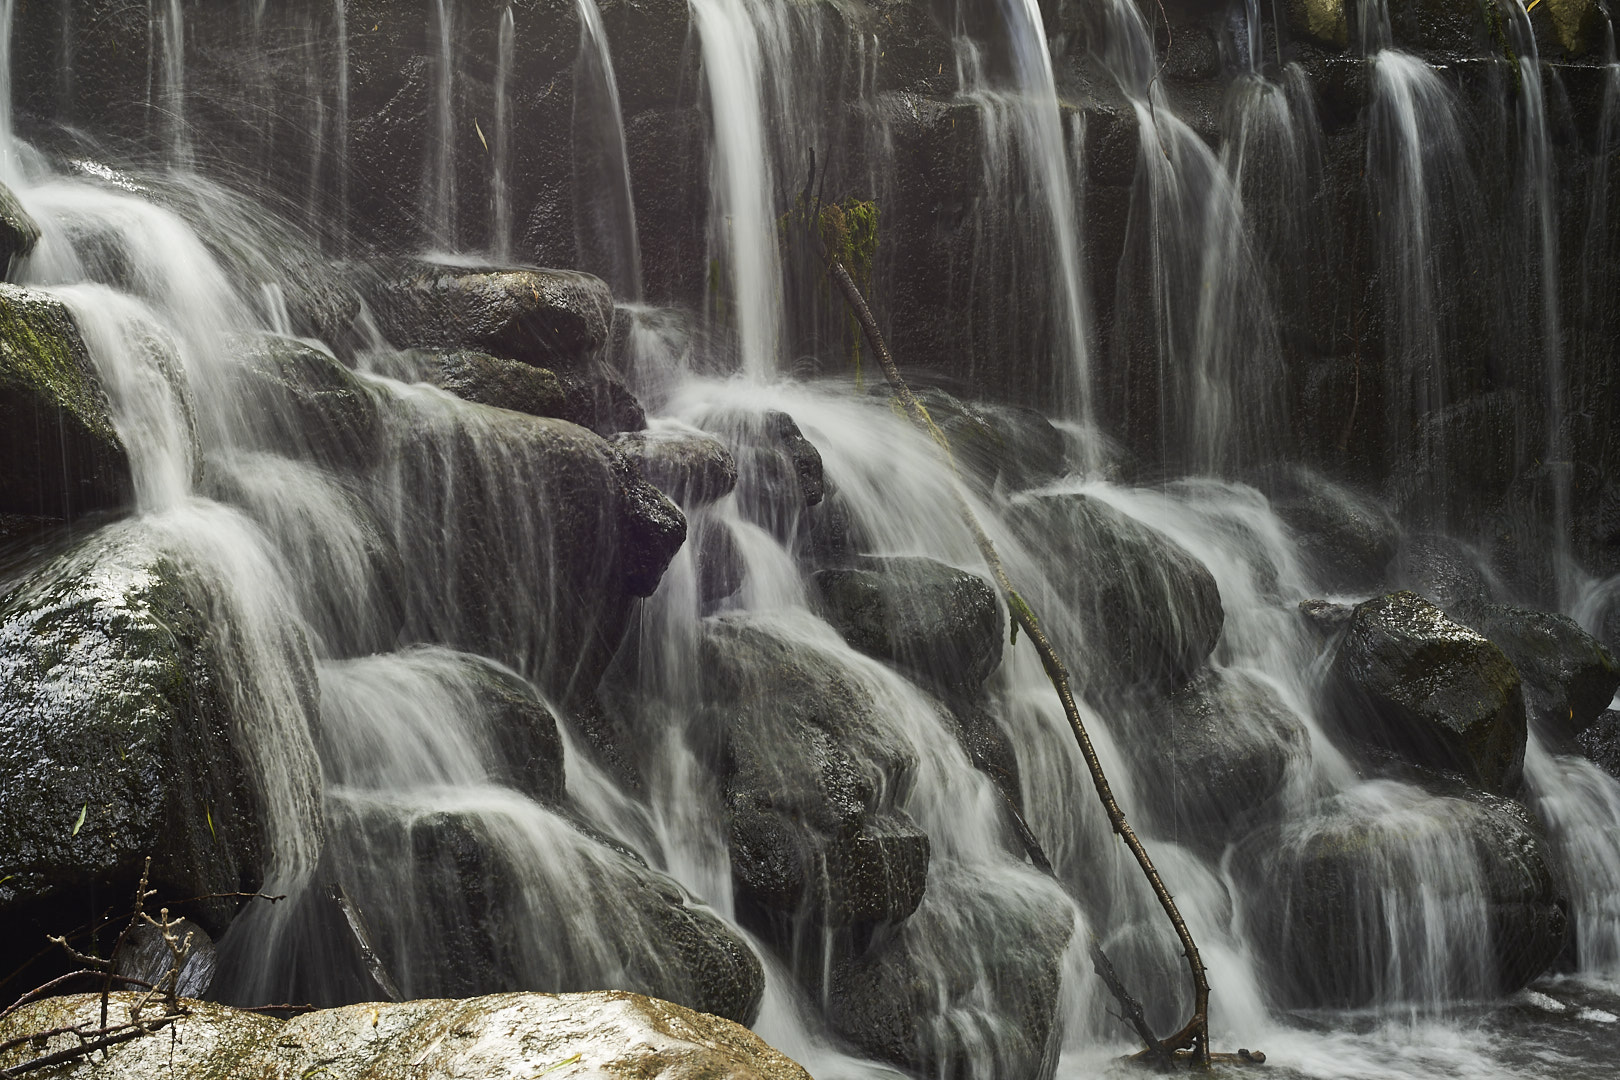
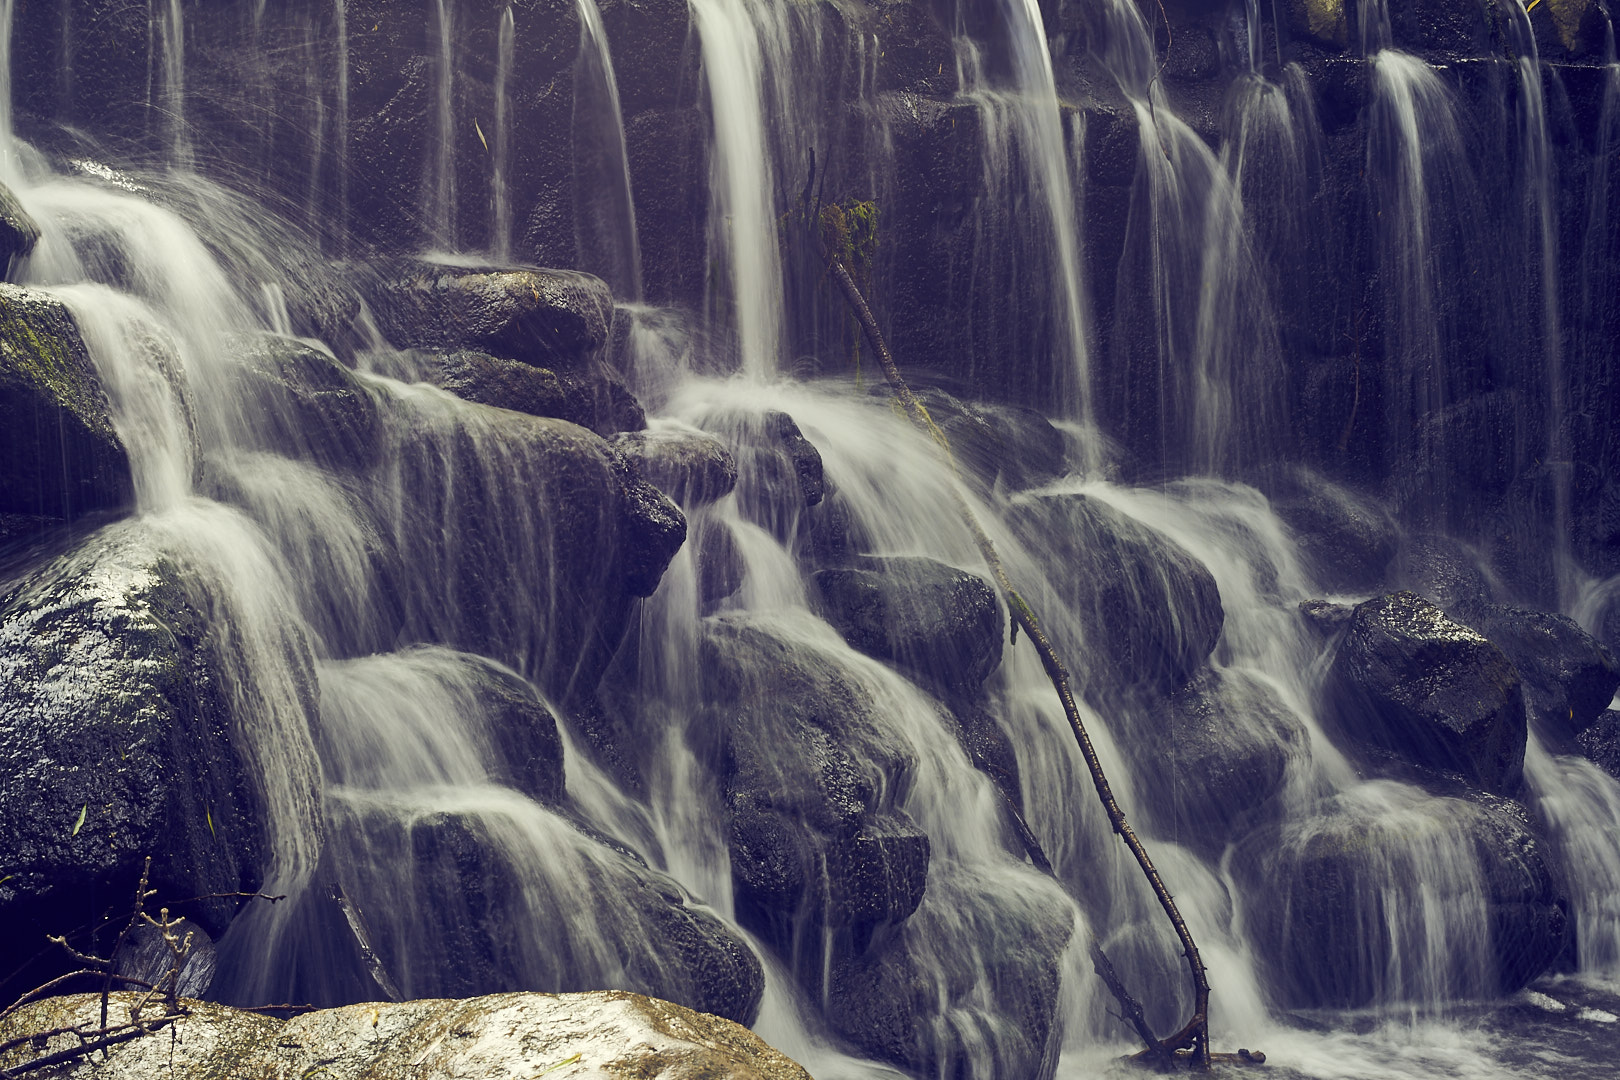
Four Edit Friday 2 – Waterfall
In this Four Edit Friday we look at a photograph of a waterfall, and make 2 color and two black and while edits.

Four Edit Friday 1 – Dead Flowers
This is an idea for a series of videos doing 4 edits of the same photograph.
Here are the final photos:
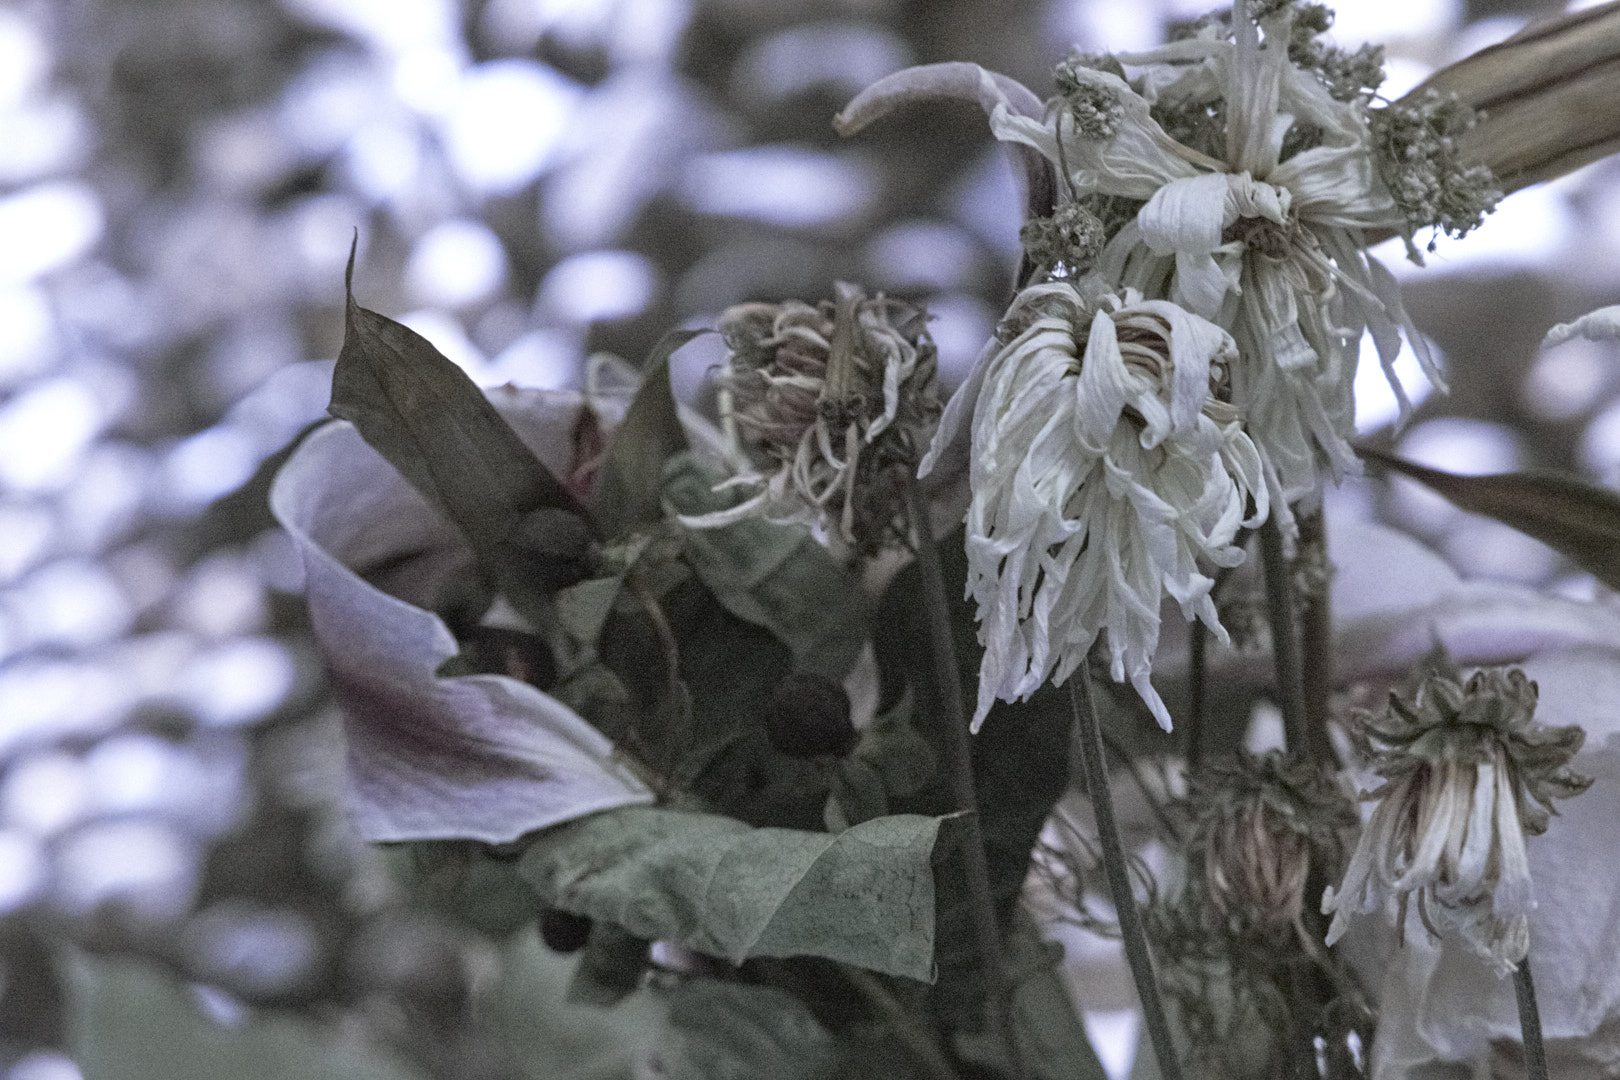
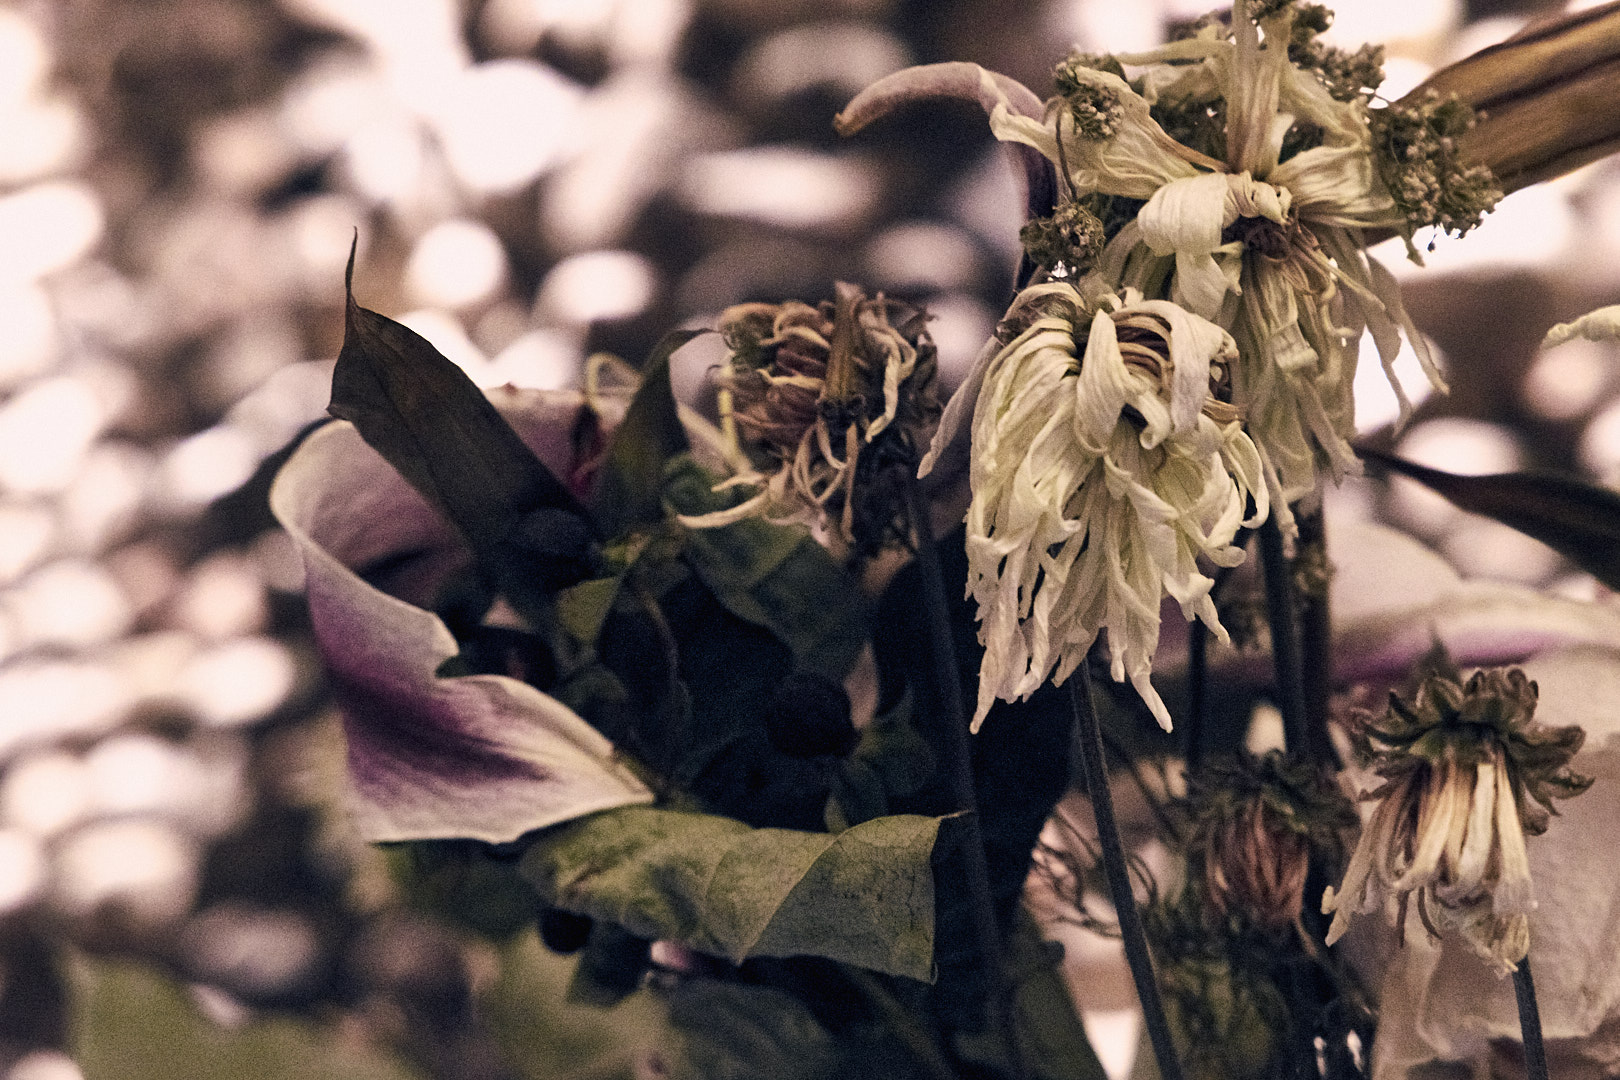
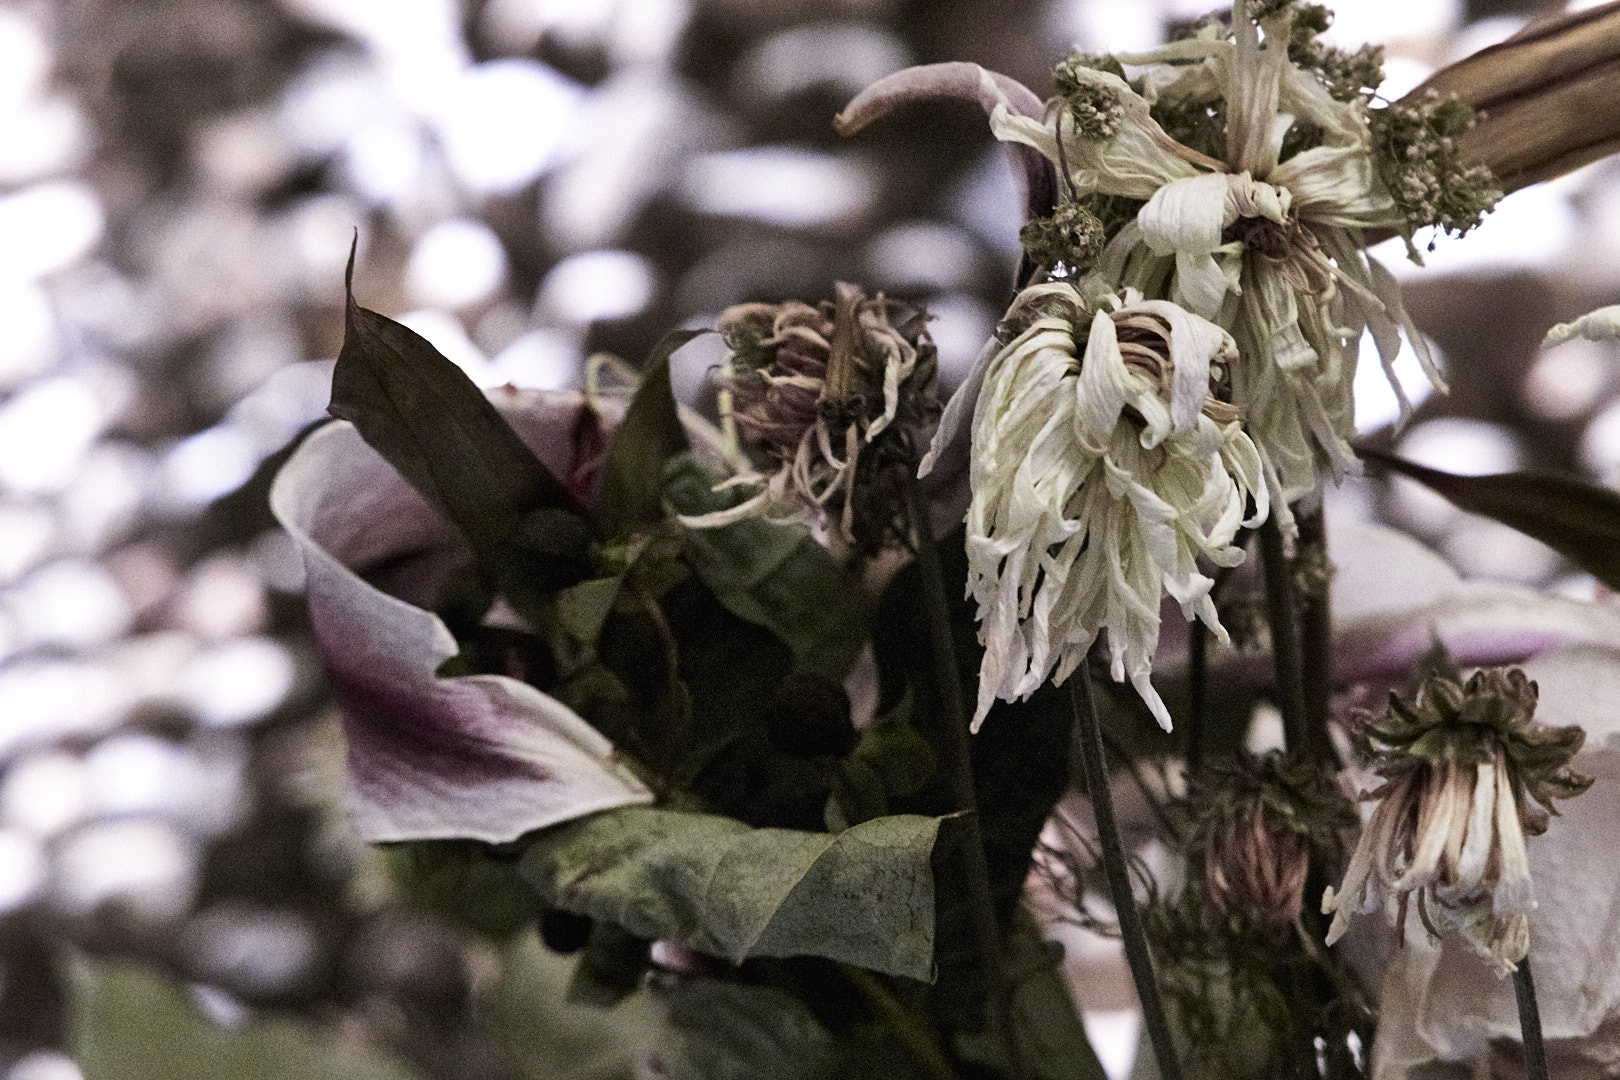
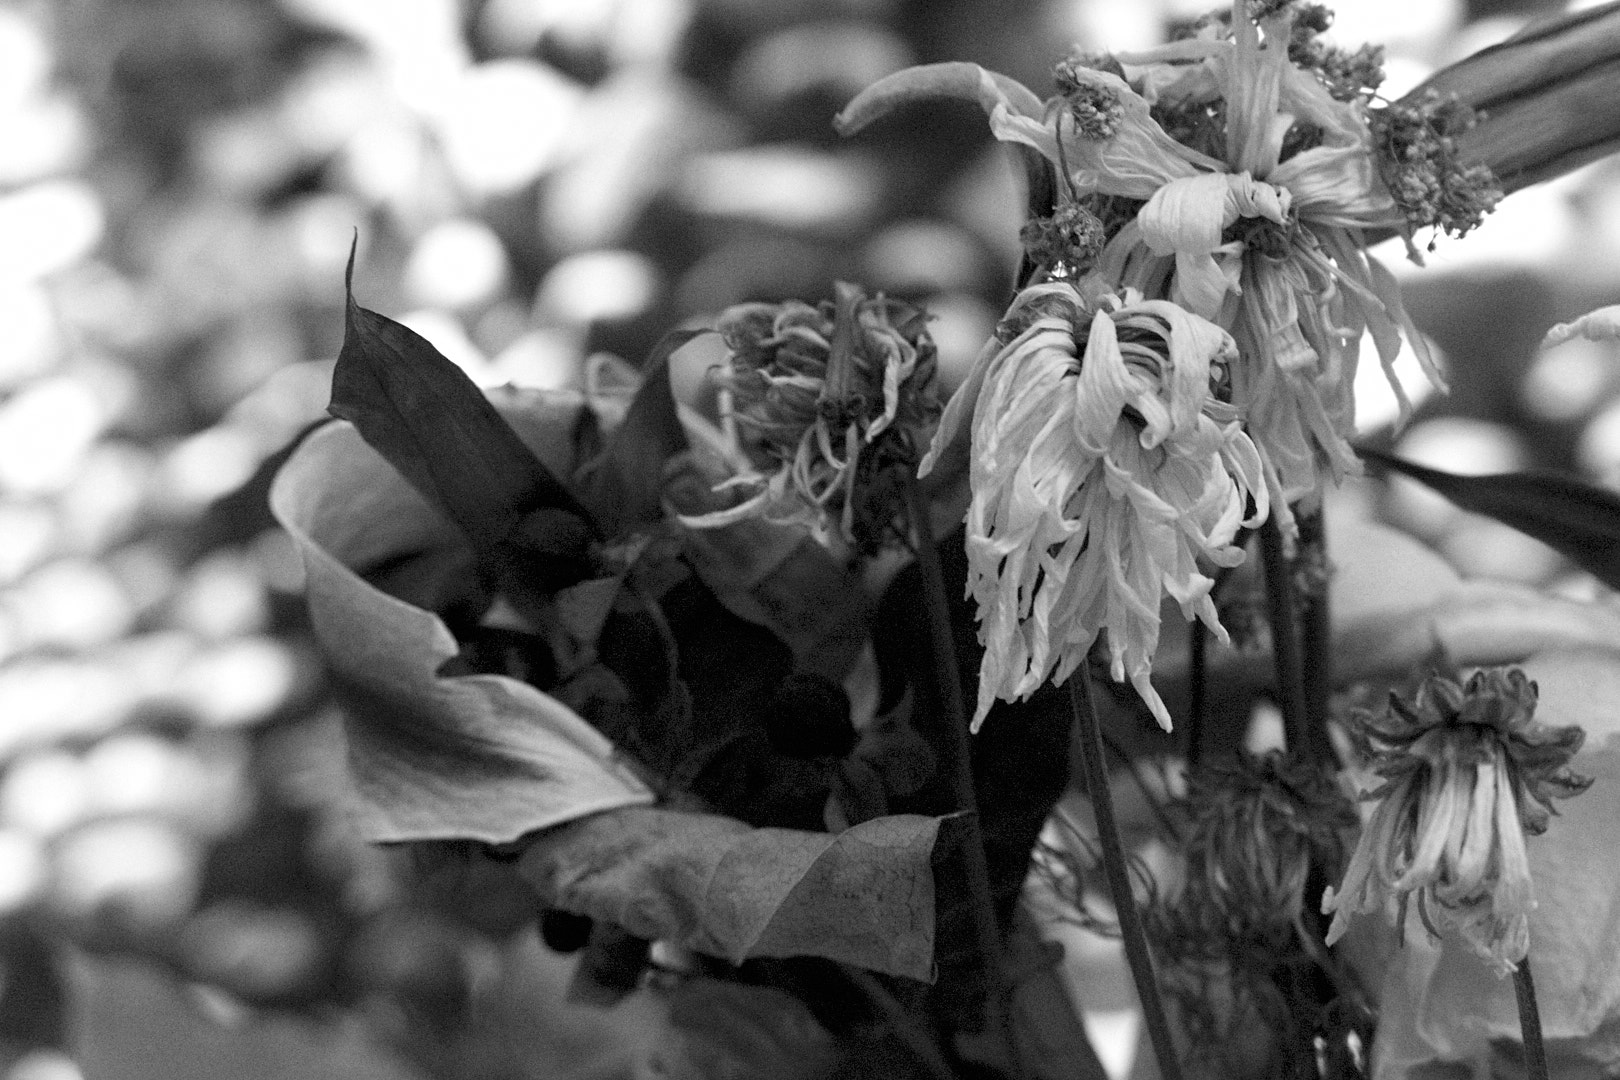
Which do you like, or how would you have edited it differently? Please leave a comment below.
Do you like this format for videos? Would you like to see more?
10 Capture One Editing Tips
After using Phase One’s Capture One for most of my photo editing, I have come up with a few tips to help get the best results. Hopefully these can help you, too.
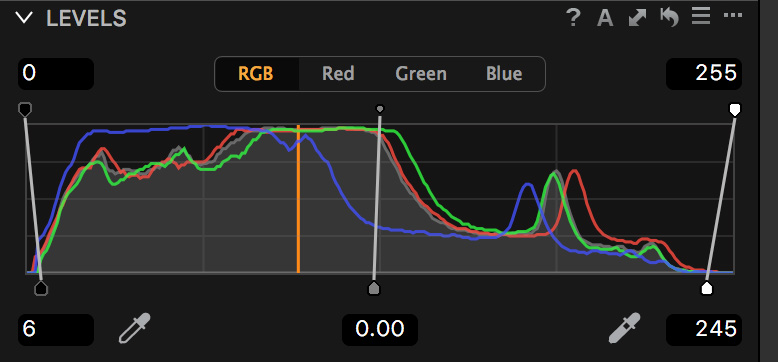
1: Setting Black and White points.
If you use Lightroom, or watch any tutorials, you have probably seen the tip to hold down the Alt/Option key while setting the white and black points. You can use the Exposure warnings in C1 the same way, but make sure that Shadow Warnings are enabled (Preferences > Exposure > “Enable Shadow Warnings” checkbox”).
I normally don’t use the warnings much, I start by setting the points to edge of the histogram, and adjusting by sight from there. When you are setting the black and white points, don’t be afraid to have some areas that are in warnings. The sun, specular highlights, and lights will often be entirely washed out, and will look wrong if they aren’t, and some shadow areas should probably wind up black.
2: Dodging and Burning.
When using local adjustments to selectively lighten dark areas, or darken light areas, using highlight or shadow recovery can render more natural and pleasing results than using the exposure slider.
If the section is too far into the mid tones, or it does not work for some other reason, you can use the HDR tools to soften the effect.
3: Overdoing Effects
Ever need just a little more shadow recovery or something? Applying a selective adjustment mask to the whole picture allows you to add more of many maxed-out adjustments.
4: Customizing Your Tools.
This one isn’t really a secret, but C1 lets you create custom tool tabs. I have one that contains Base Characteristics, Rotation & Flip, Exposure, Levels, White Balance, High Dynamic Range, Clarity, Sharpening, and Black & White. I spend 90+% of my time in the browser tab and my custom one.
5: White balance in Black & White?
Yes! Adjusting the white balance in B&W photos can drastically alter the look. The white balance is applied before the B&W conversion, so adjusting it can act a lot like the sliders in the B&W tool to adjust the levels of individual colors. It is less predictable, but can sometimes make adjustments that are difficult with just the color sliders. Setting the white balance can also add separation for some colors, so I would recommend setting white balance before you do the B&W conversion in any case.
6: Try some non-conventional adjustments
Highlight recovery not looking quite right? Try lowering overall exposure, then using shadow recovery to lighten the shadows. There are a number of maybe counterintuitive things like this to try. It can seem weird, but like they say in audio “if is sounds (looks) right, it is right.”
7: Smoothing Colors
The skin tone color editor tool has additional tools to smooth out colors, however, the tool is by no means limited to skin tones. You can use it to smooth any tones in the image, and since it is available as a Local Adjustment, it can be applied to multiple tones in an image.
8: Enlarge tools
Some tools, like the Color Balance tool, can be difficult to use at the size it is on tool palate. If you click and drag the top of the tool off the palate, it becomes a floating window, and can be resized. Just drag it back onto the palate to dock it again.

9: The many ways to adjust contrast
There are several ways to adjust contrast in an image, including the contrast slider, Levels tool, High Dynamic Range tools, curve tool, and even the Color Balance tool. Play around with them all, and learn their strengths and weaknesses.
- Contrast: Very easy, but little control. Prior to version 9, it effected the saturation of the image too much to make very large adjustments. With the engine updates in 9, you can use it a lot more, but may need to add some saturation.
- Levels: This sets your black and white points. I usually start by dragging the bottoms of the bars to the ends of the histogram, and a little past if it looks good. Once you pass the ends of the histogram, the image starts clipping.
- High Dynamic Range: These only reduce contrast, but you can “overdo” some of the other tools, then soften it with the HDR tools.
- Curve: The most control, and the easiest to mess up. An “S” increases contrast, the reverse can be used to bring out highlight or shadow detail. Use the Luma curve for less impact on saturation and color.
- Color Balance: I haven’t used this much, but you can adjust the brightness of highlights, midtones, and shadows.
10: Selective saturation adjustments.
One of my biggest uses for the Color Editor is to tame the saturation of greens in an outdoor image. To do this, I increase the overall image saturation, then bring the greens down. You could also select the greens, invert the selection, and increase the contrast.
One thing to be aware of is that the overall saturation is applied before the Local Adjustments, so if you desaturated the image, you may not be able to add saturation back in.
I hope these give you some ideas to improve your editing.
Do you have any tips or tricks? Please leave them in the comments.
Why I Shoot RAW
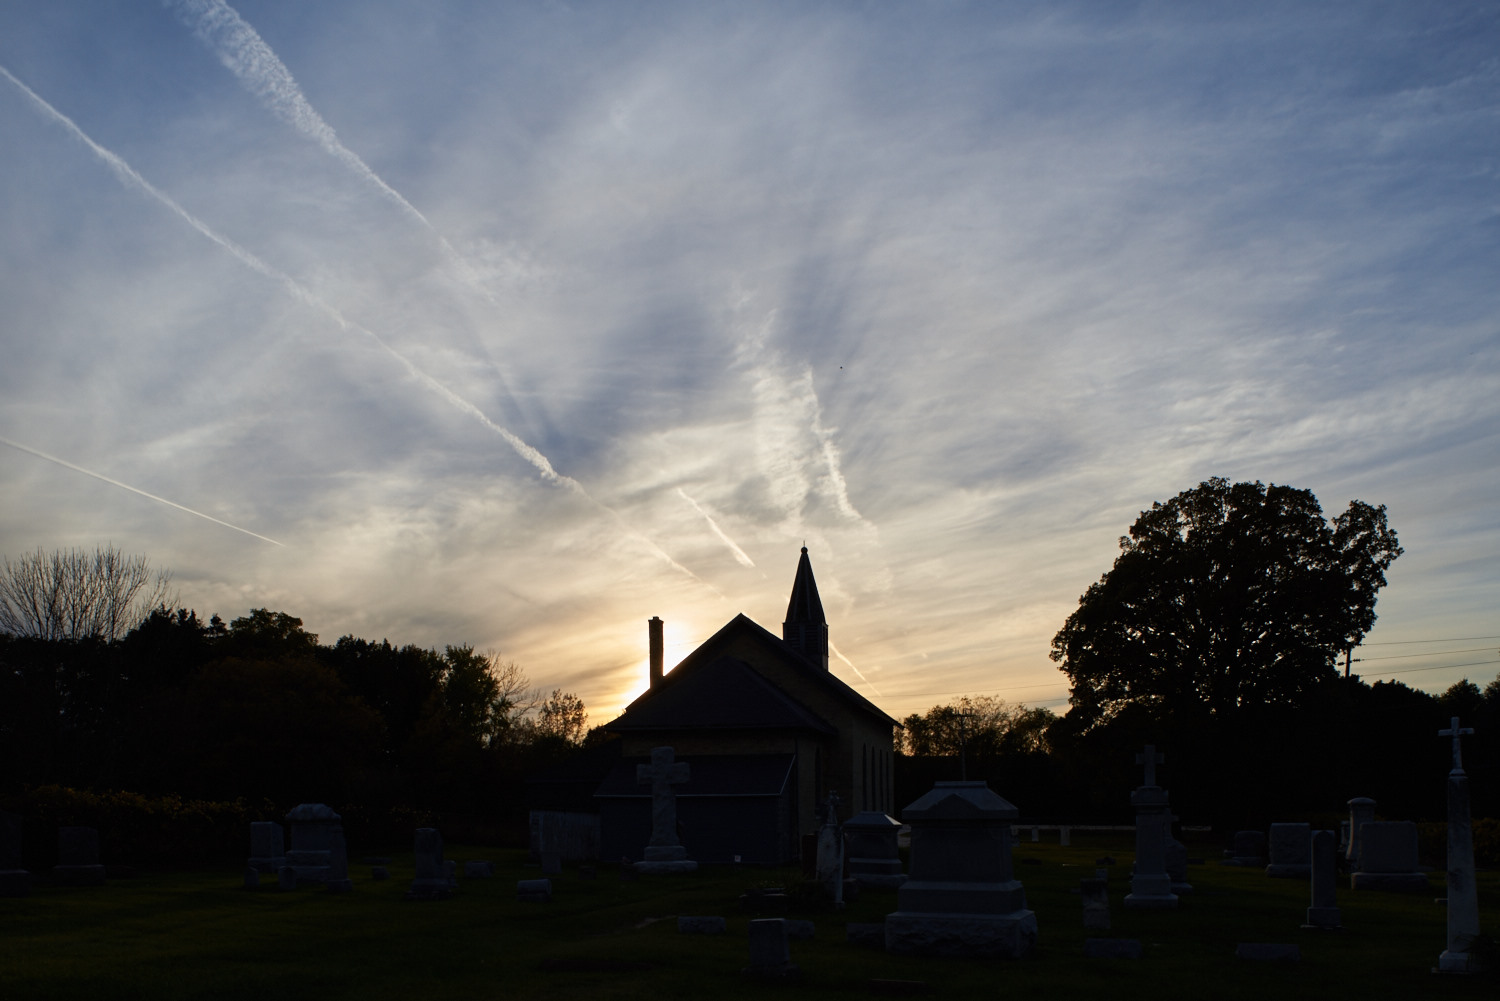
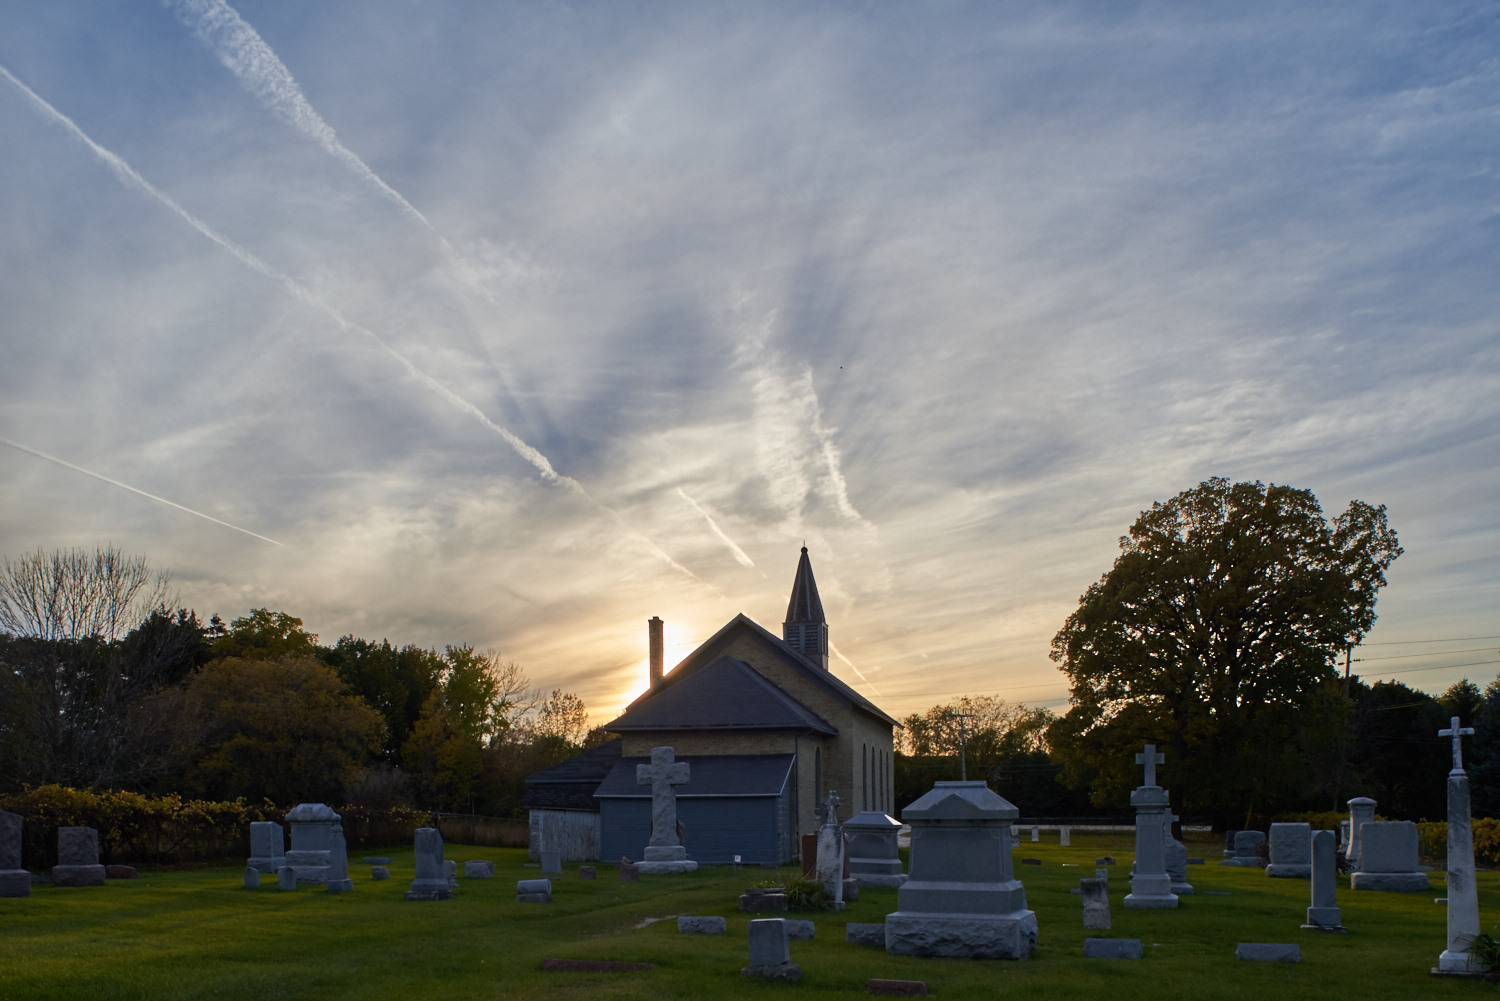
The other night I took a little detour on the way home to photograph a small church near my office.
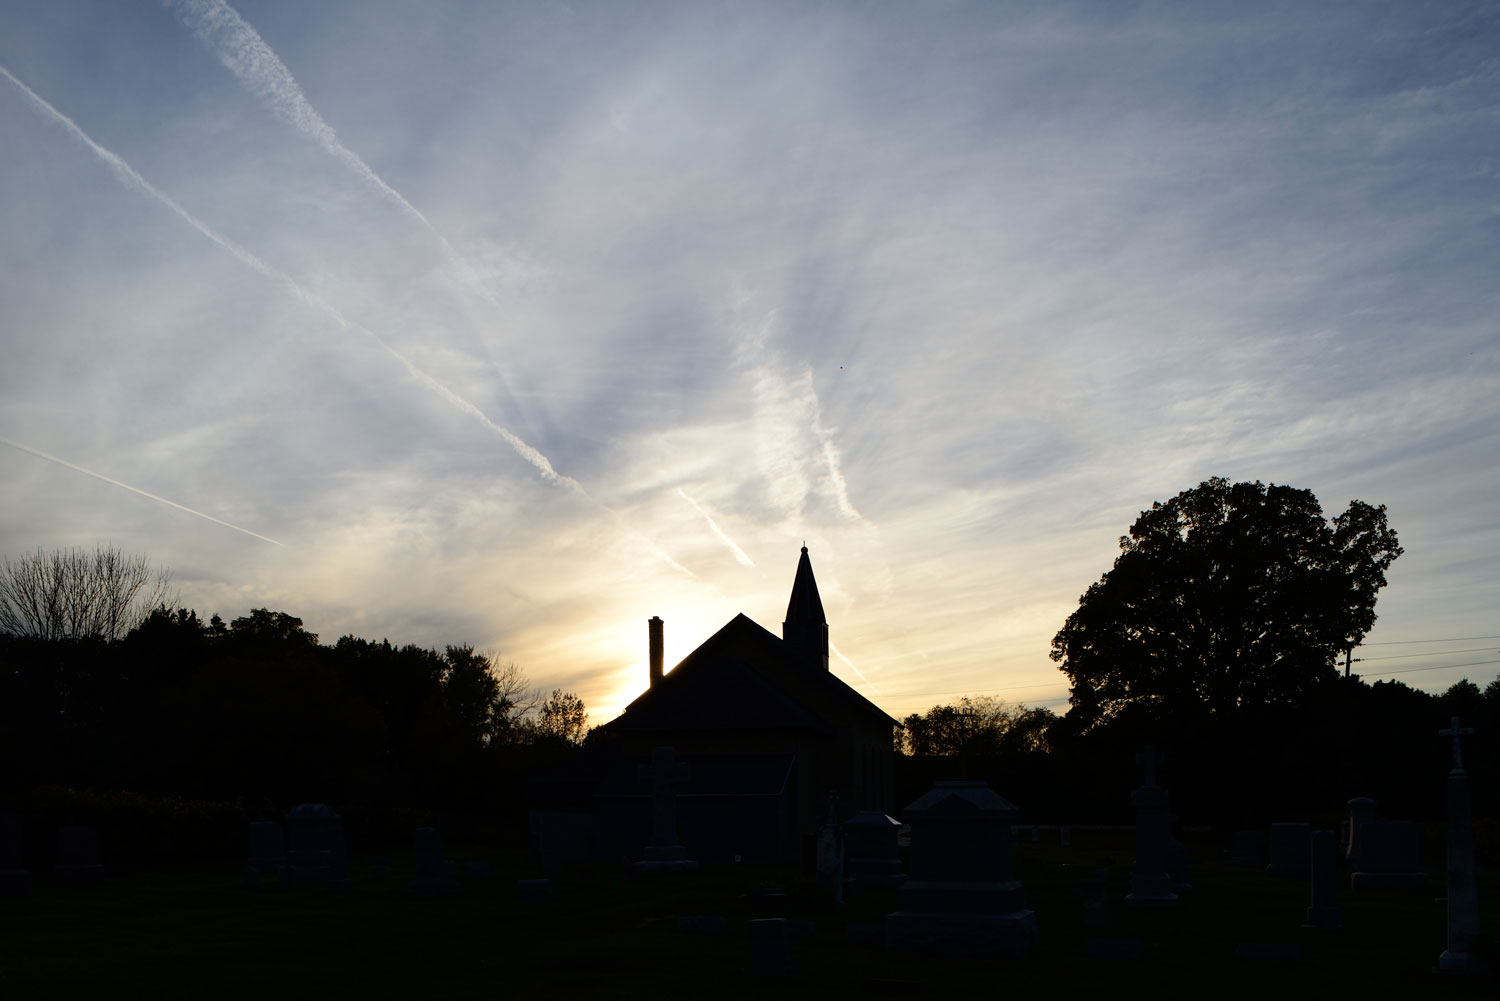
It was sunset, and the church was silhouetted against an interesting sky. The photo below is default off the camera. Capture One makes a couple changes by default, so it’s a little different than a camera JPEG would be. This is pretty much the photo I saw, and wanted to capture.
The image was captured at 1/400th of a second, I think at f/11. The camera was a Nikon D610 on a tripod, with a PC-Nikkor 28mm F4. The lens does not record aperture information, thus the “I think” on f/11.

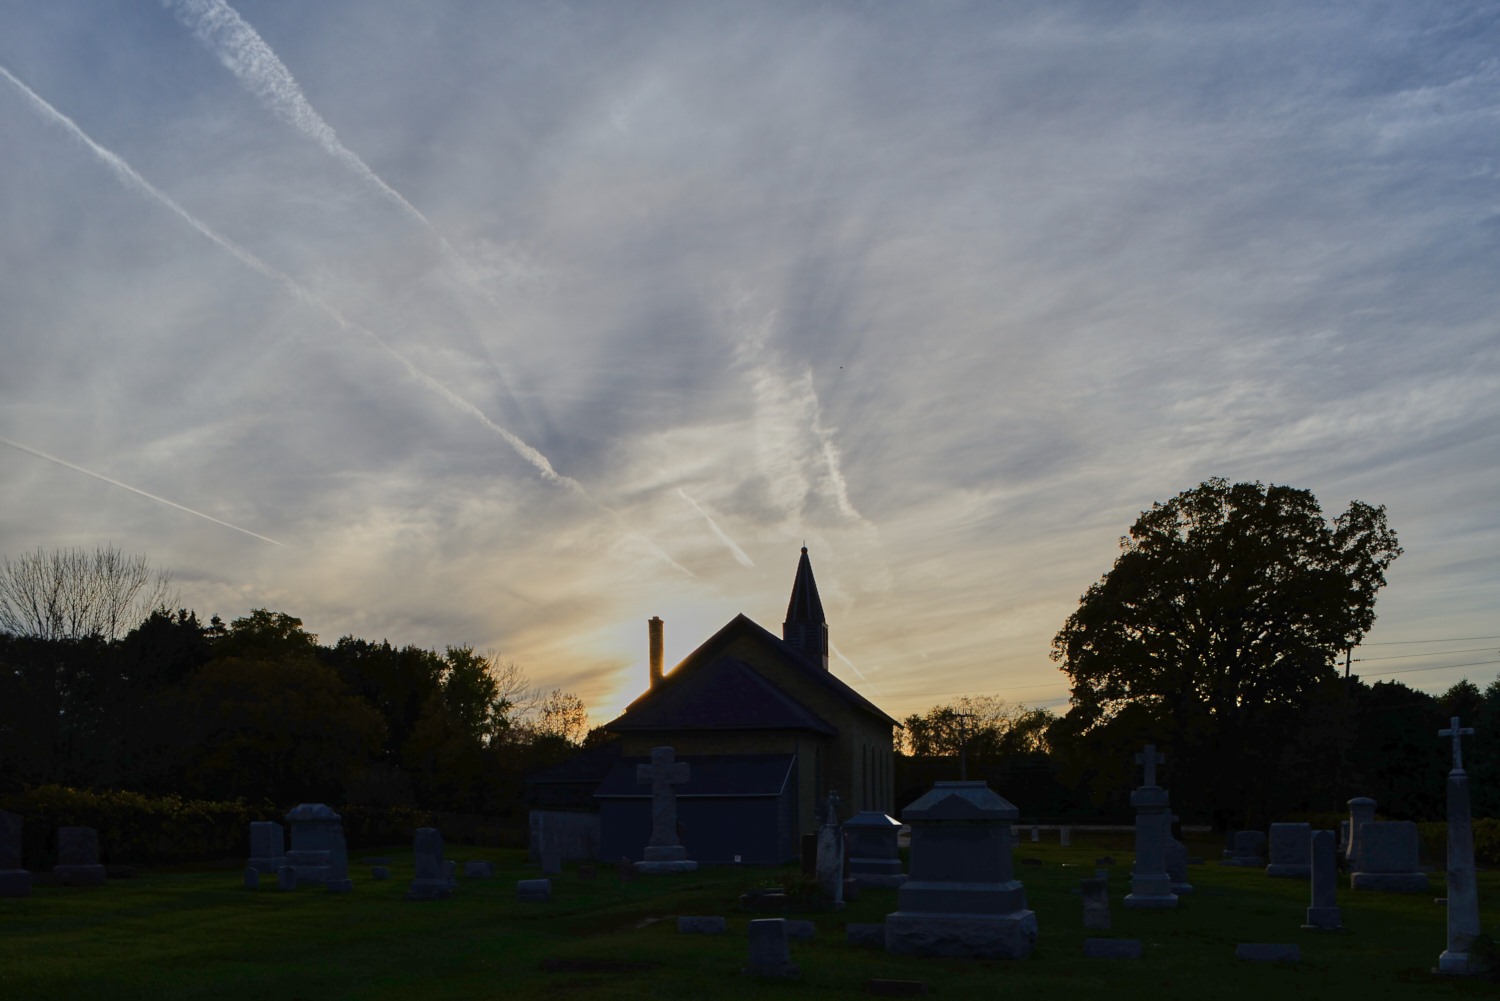
I used Highlight recovery to bring out more detail in the sky.
Using shadow recovery, we are able to bring a lot of detail into the foreground. In the original, almost everything below the skyline is black, with the shadow recovery, we have a lot of detail that was hidden before.
For a comparison, I created a highest quality JPEG with Nikon NX-D, using the vivid picture control, which is probably what I would have used for this image shooting JPEG. As is, it looks fine, pretty much the same as we got out of the default settings in Capture One.
But as we start to bring the shadow and highlight recovery in, you can see how much is missing in the shadows. The blown out area around the sun is also larger than edited RAW. This is with the same settings as the RAW, with highlight and shadow recovery both at 100.
I tried to replicate the results with curves, and that ended up with some more shadow detail, but killed the sky.
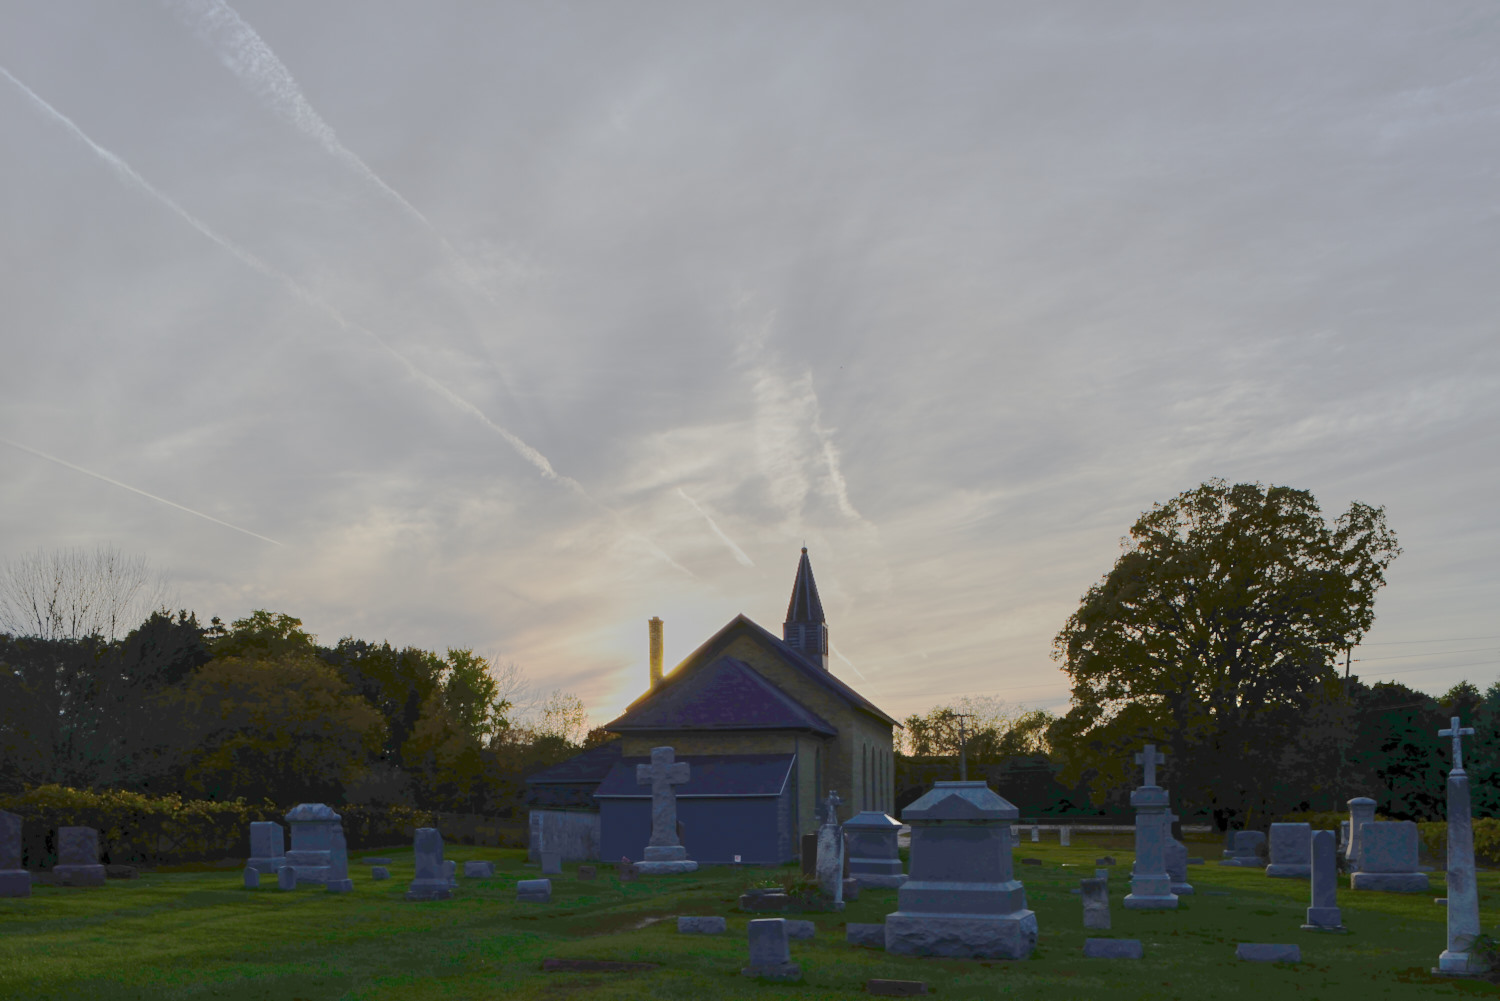
Here’s the final version of the RAW, with some punch clarity added. Some comparison points: the color in the sky, the chimney is “eaten away” by the blown highlight of the sun. You can also see fairly severe posterizing in the shadows on the JPEG edits at full size.

In this image, I might leave the foreground in silhouette anyways, but I wanted to demonstrate how you can squeeze a lot more dynamic range out of a photograph. For a scene like this, there really isn’t a “proper” exposure that would include the whole image. But with a few minutes of RAW editing you can have very good images with an extended dynamic range, without having to use HDR stacking techniques or the like. Using the dynamic range built into the RAW file avoids having to keep the camera still through multiple exposures and the problem of moving objects in an image. I have also run into situations where light washed into the darker areas of an image on stacked HDR that looked very unnatural. This, on the other hand, captures an image very like what I saw when I was standing there. Using JPEG, on the other hand, throws away a lot of image data that it deems unnecessary, and while some recovery is possible, it is much more limited.