Want to waste less money, time, and effort in your outdoor shooting? Going places that don’t have the right views, wrong light, or the wrong angle of the light and you can wind up with sub-par shots, or missing them entirely. With this post, I will show you how to use some websites and apps to better plan location shoots, so you can better use your time and resources. Let’s take a look at the tools I used to plan this shot weeks before I actually took it.

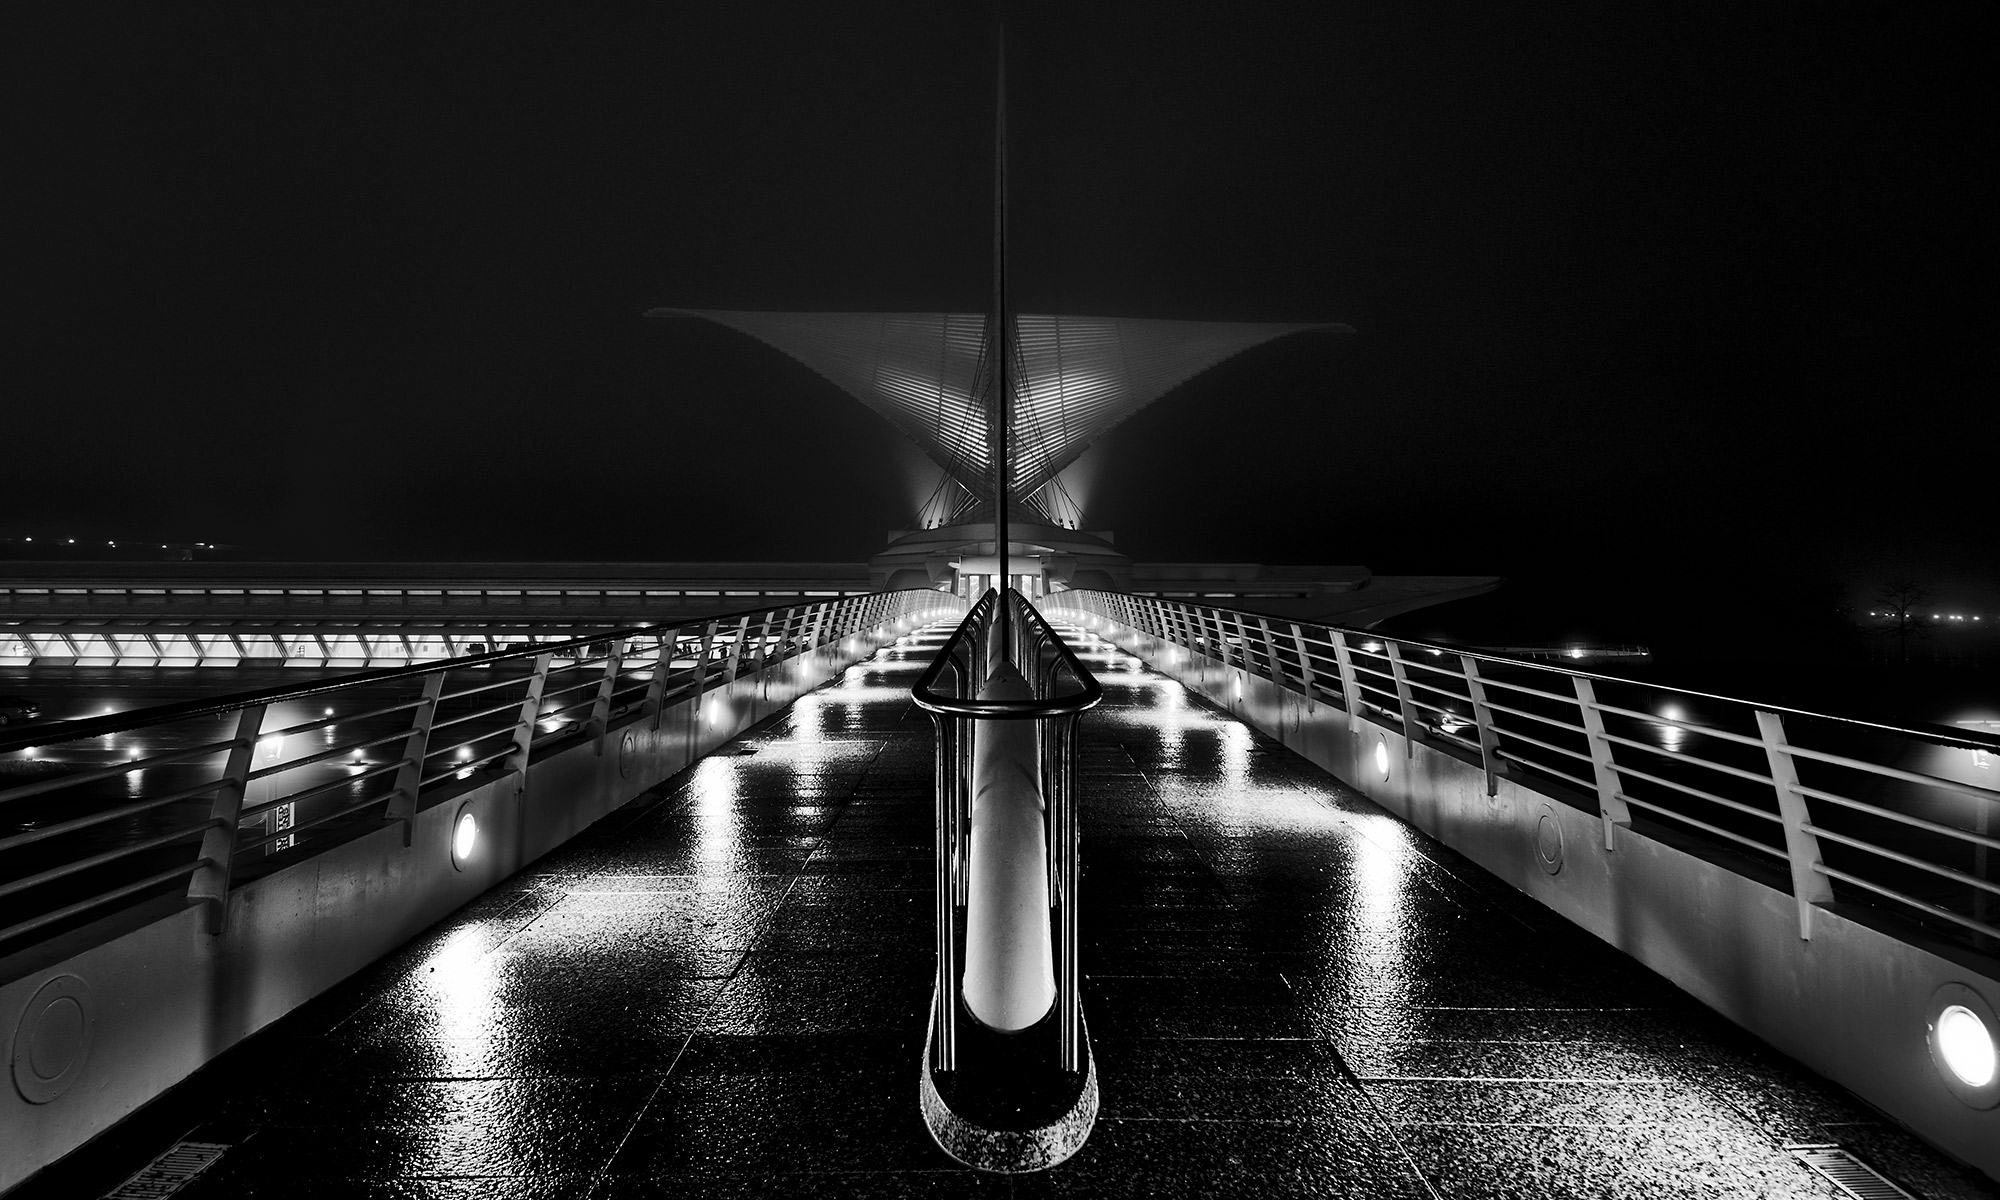
This is the Cana Island Lighthouse in Door County, WI. I thought of trying to get this shot, and then started doing the research to see if it was possible.
Looking at Google Maps/Google Earth, (web, iOS) there was a road that followed the shoreline closely, and it looked like it would be a good vantage point.
Step one was to look at Google Street View, and see if I had a clear shot from anywhere on the shore, and if the lighthouse was still reasonably visible over the trees. Google Earth showed that both of these were good, so on to the next steps.

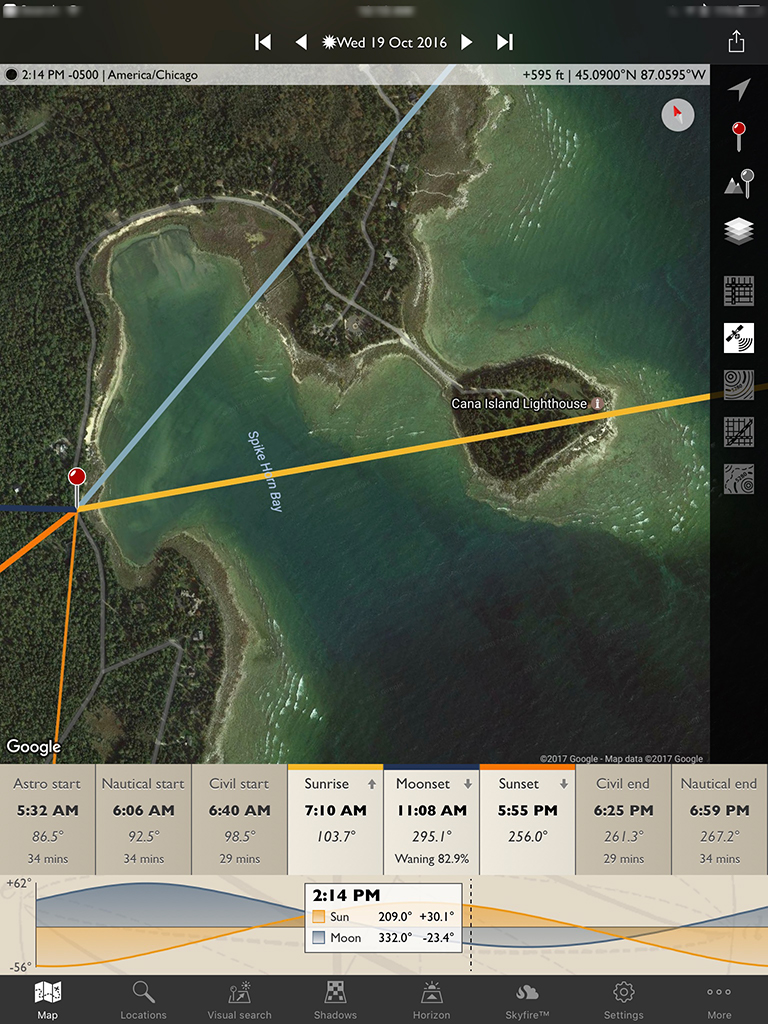
When planning sunrise, sunset, or moon pictures, The Photographer’s Ephemeris (TPE) (Web, iOS, Android) is an invaluable tool. Placing the pin on your vantage point, the lines show the angle of the sun and moon rise and set. Sunrise is indicated by the yellow line, sunset by the orange line, moon rise and set by the light and dark blue lines, respectively. Times for astronomic, nautical, and civil dawn and dusk, and sunrise/sunset are also indicated.
TPE showed that on the week we would be in the area, the sun should be rising over the island, just as I was hoping.
For an additional quarterly charge, you can subscribe to SkyFire, which gives an estimate of the likelihood of good sky colors over the next few days. This is only an estimate, but it can be helpful.
PhotoPills also provides the sunrise/sunset time and angle planning, as well as guides for the Milky Way, both in map form and augmented reality.
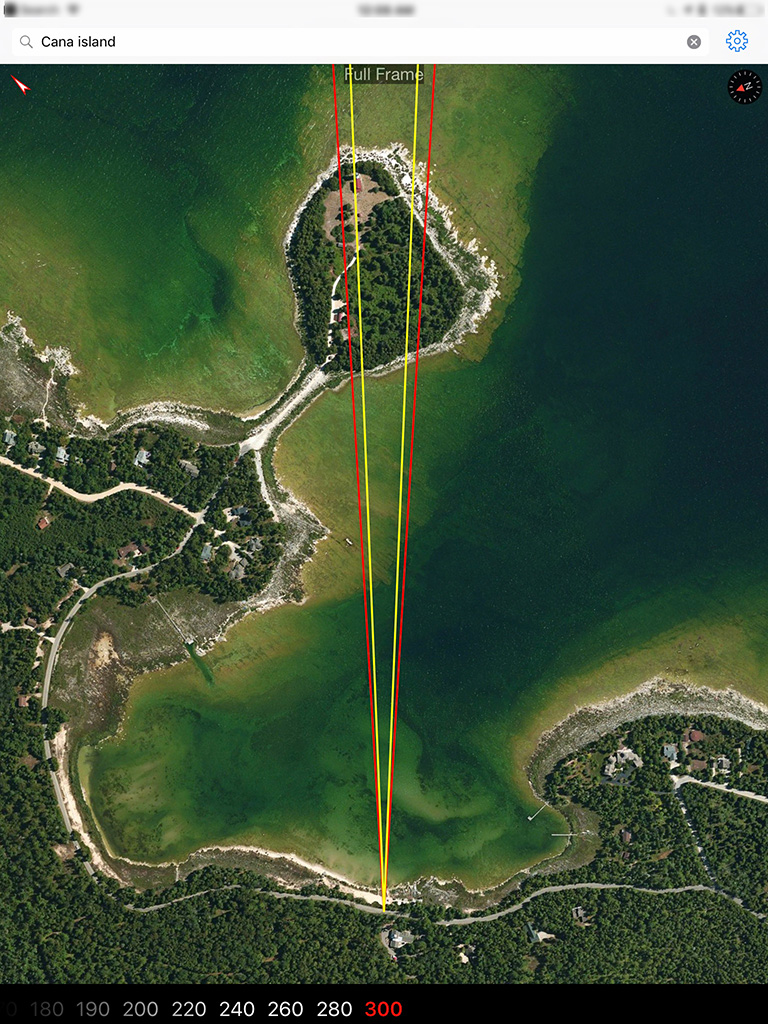
A final check was done with one of my apps, Lens Planner (iOS), to verify that the lenses I had would get me a good angle of view on the island and lighthouse. The 300mm on the long end of my 70-300 would be fine for this shot, so I was good to go.
With all of these, and checks of drive time and the weather, I was able to get to the spot in good time, and take the photograph I was looking for.
Of course, you can never guarantee light and weather, but by carefully using the available tools you greatly increase your chances of success. It is also a good idea to plan multiple options, so that if you don’t have the weather on your side you can fall back to a plan B that works without it.
What tools do you use to plan and execute shots? Please leave recommendations for the community in the comments.
One Reply to “Digital Scouting”